• Galleries
  • Wildlife
  • Travel
  • Fine Art
  • Blog
  • About
Menu

ELIZABETH ACEVEDO PHOTOGRAPHY

  • Galleries
  • Wildlife
  • Travel
  • Fine Art
  • Blog
  • About
Sandhill-cranes-arriving-sunset-Acevedo-298.jpg

Migration Magic in Nebraska Skies

May 5, 2021

What do you picture when someone mentions rural Nebraska?  For me, it was classic American scenes of small-town life and farmhouses along dusty roads.  What I didn’t picture was a birder’s paradise.  

Then I learned that, every spring, hundreds of thousands of sandhill cranes funnel through western Nebraska in one of the world’s last great migrations.  Feeling like I stumbled on a secret that only locals and die-hard birders know about, I had to go see for myself.

Is it really a secret if 700,000 of your (feathered) friends already know about it?

Every year between mid-February and mid-April, most of the world’s sandhill crane population migrates north from their wintering grounds in southern U.S. and northern Mexico through a narrow bottle-neck in Nebraska’s Platte River Valley.  There, the cranes stop to recharge for a few weeks before tackling the next long leg of their trip. By summer, they’ll be in Canada, Alaska and even Siberia for their breeding season.

When I visited in late March, there were almost 700,000 sandhill cranes estimated to be in the Platte River Valley!   

In the early morning, sandhill cranes take off in big waves from the Platte River.  © 2021 Elizabeth Acevedo.

In the early morning, sandhill cranes take off in big waves from the Platte River. © 2021 Elizabeth Acevedo.

Action-packed times on the Platte River

Around sunset, huge groups of cranes start arriving in wave after wave, landing in the Platte’s shallow areas to spend the night. By the time they settle in, tens of thousands of cranes can be in just one spot. Where we were on the river, it was estimated that about 50,000 cranes landed for the night.

If nothing disturbs them, they’ll rest there together until the morning when they head off to neighboring corn fields to feed. The morning takeoff can happen gradually in small groups or all at once in one giant, jaw-dropping exodus.

Ready to get their day started, sandhill cranes leave in a group lift off from the Platte River.   © 2021 Elizabeth Acevedo.

Ready to get their day started, sandhill cranes leave in a group lift off from the Platte River. © 2021 Elizabeth Acevedo.

Where was I during all this drama? Hiding out in photo blinds

It’s a dream for a wildlife photographer or bird lover to have a front row view as tens of thousands of sandhill cranes land on the river at sunset and fly off around sunrise. But the nightly roost is when the cranes get some much needed rest. They are wary and easily scared off by humans, which is understandable as this is the only place on their migration route where they aren’t hunted. So, to have a great view of sandhill cranes on the river without disrupting their rest time, we got into photo blinds. 

Blind at Crane Trust on Platte River.  © 2021 Elizabeth Acevedo.

Blind at Crane Trust on Platte River. © 2021 Elizabeth Acevedo.

Blind at Rowe Sanctuary on Platte River.  © 2021 Elizabeth Acevedo.

Blind at Rowe Sanctuary on Platte River. © 2021 Elizabeth Acevedo.

Two of the main conservation organizations, Iain Nicholson Audubon Center at Rowe Sanctuary and Crane Trust, offer photo or viewing blinds on the banks of the Platte River.   For our small group tour with Summit Workshops (which I highly recommend!), our leaders Michael Forsberg and Chris Steppig reserved blinds for us to use in the mornings and evenings.

With years of experience photographing cranes, Mike and Chris shared a ton of crane knowledge with us, including how to keep a low profile in the blinds. In the afternoon, we got there long before the cranes began flying in and we snuck out in darkness after they had settled on the river. The morning routine was the same, just in reverse. We wore dark or muted colors, stayed quiet in the blind on the trails and, after dark, used only red light.

I don’t doubt that the cranes were aware of the bunch of humans staring out at them from wooden boxes. But, by doing our best to lay low, they weren’t bothered by us, at least not enough to leave the river.

Those country roads that I expected … led to more cranes. 

Daytime was for driving around small country roads to see a different part of crane life. The corn fields are where the birds build up their reserves by feeding on old grain left from last season’s crops, insects and even small mammals. Plus, they hang out with their families and friends, teach their young, and do their famous crane dances to show off for their mates and rivals.

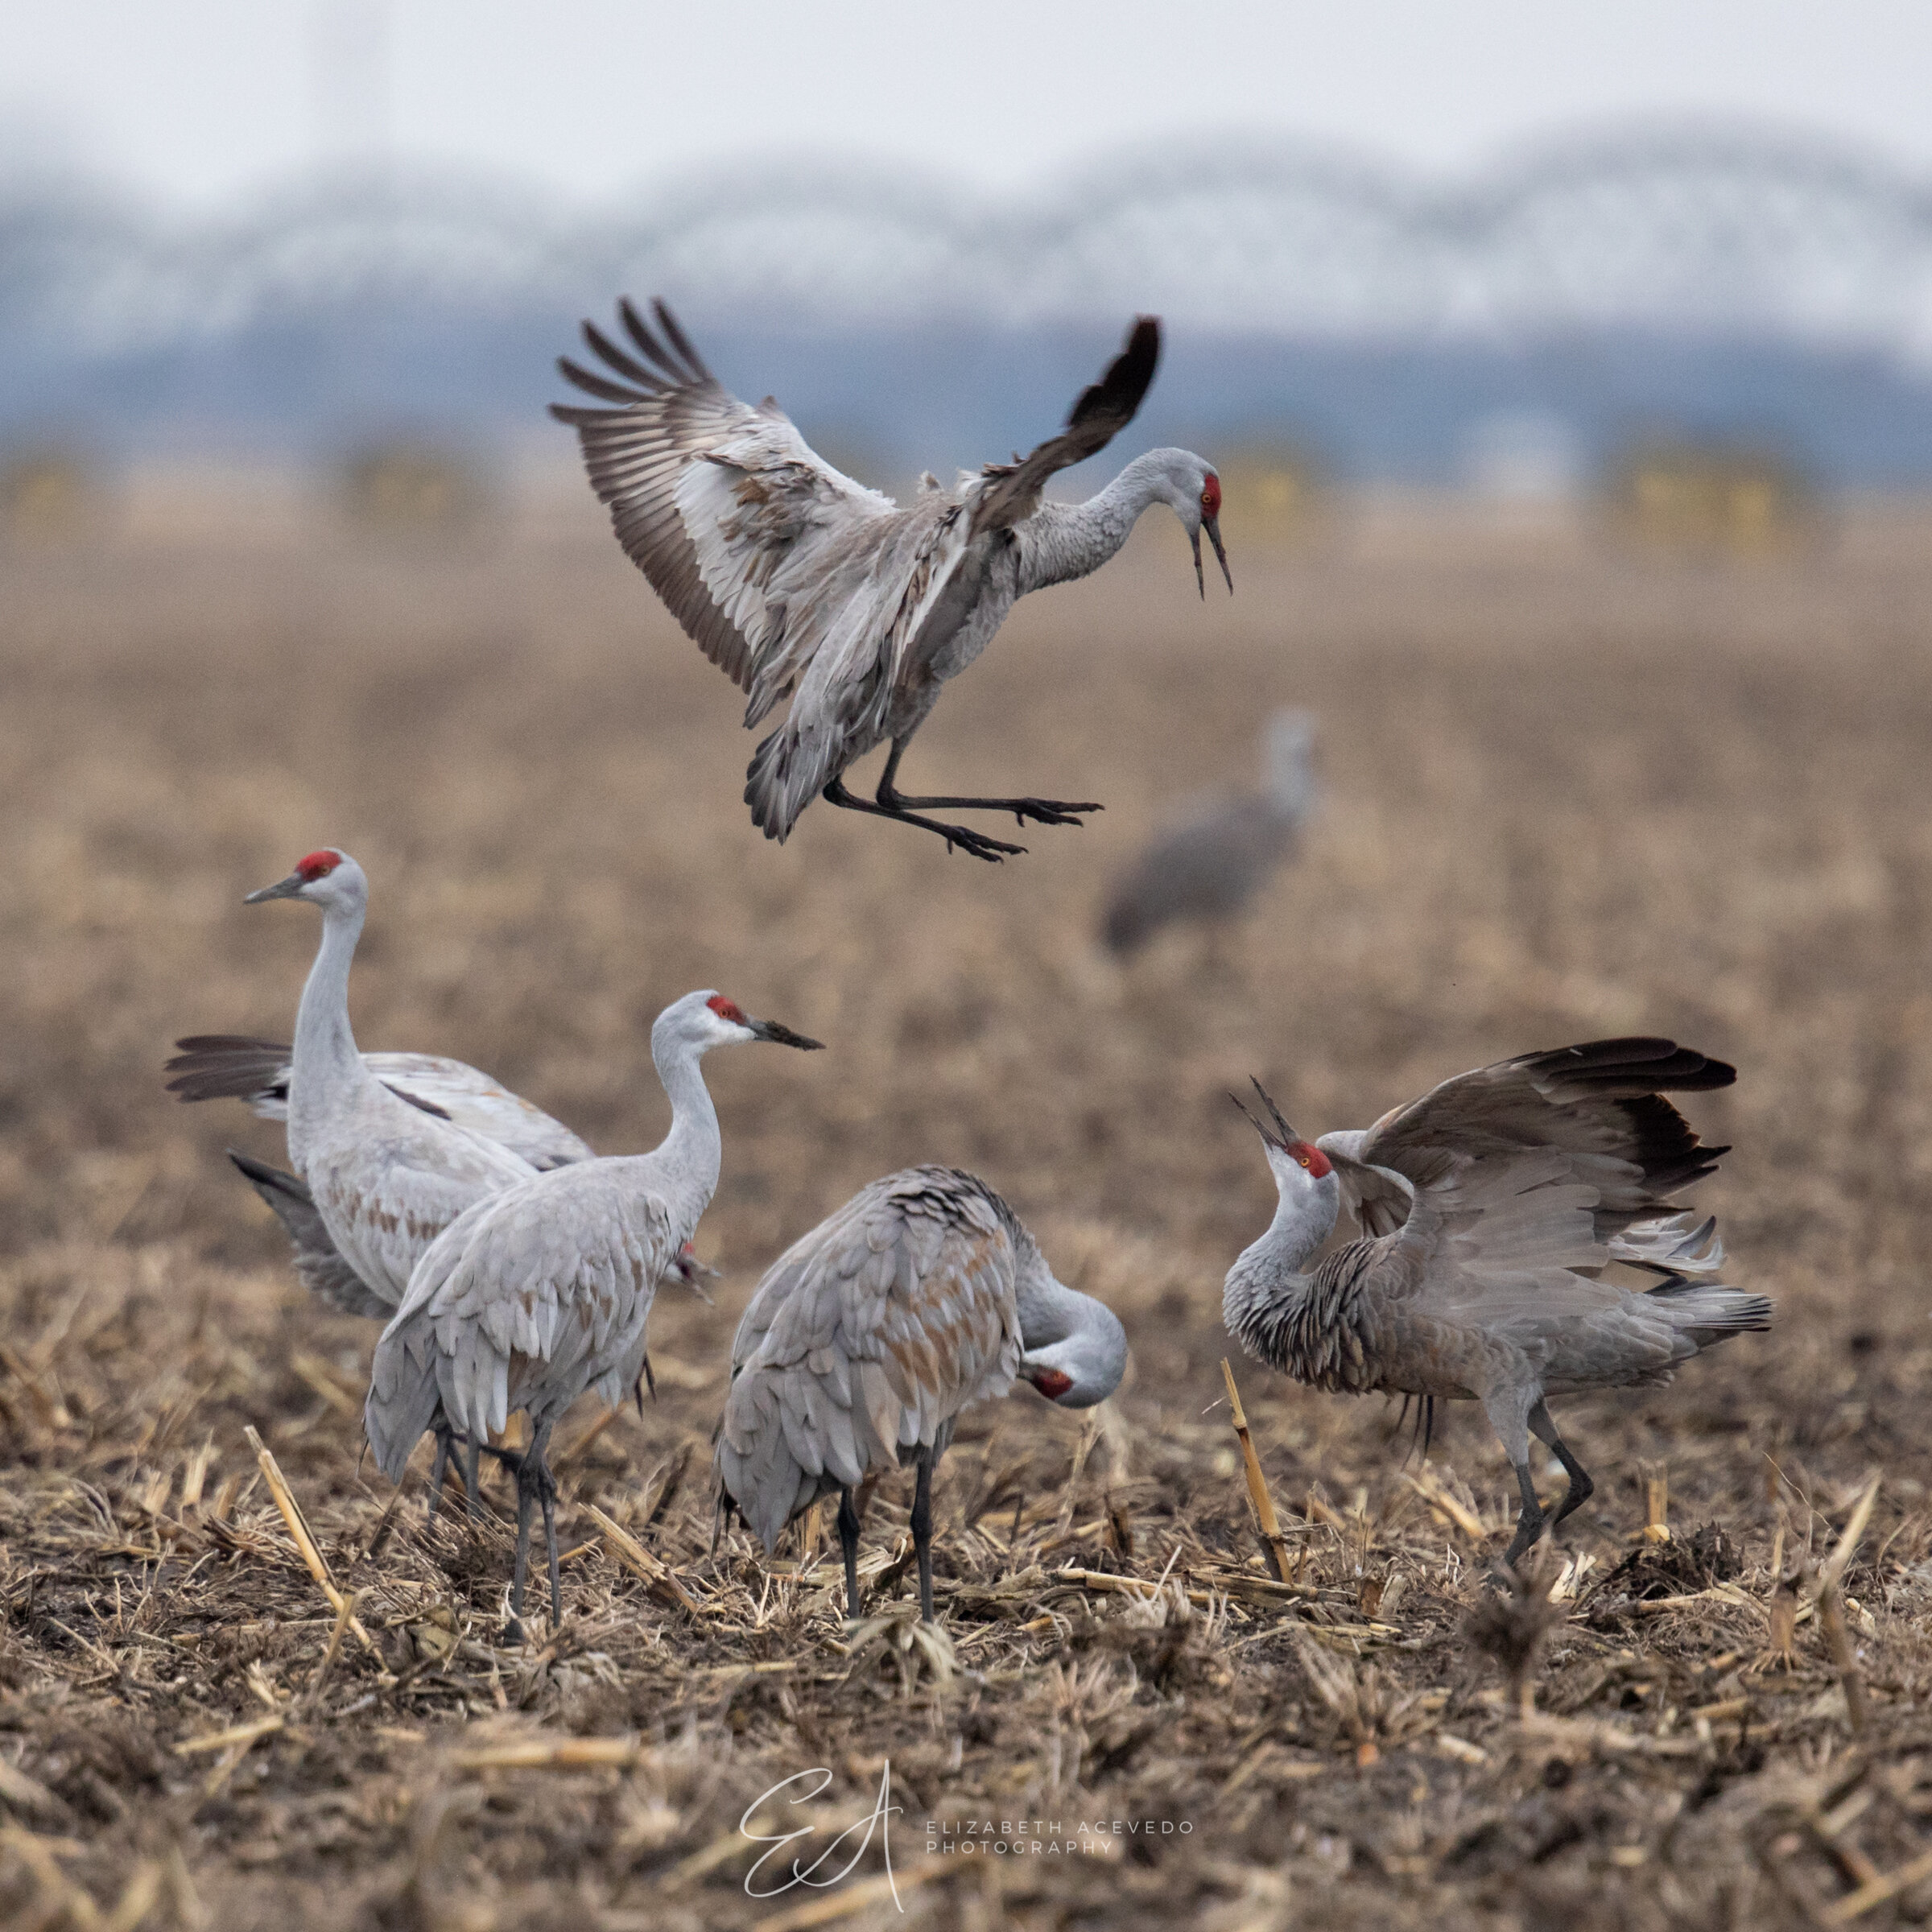
Sandhill cranes dancing in the Nebraska corn fields.  © 2021 Elizabeth Acevedo.

Sandhill cranes dancing in the Nebraska corn fields. © 2021 Elizabeth Acevedo.

The quiet time sitting in my car surrounded by sprawling farmland just watching the cranes go about their day had a peaceful charm that I liked just as much as the more dramatic sunsets and sunrises on the river.

Young sandhill crane foraging in corn field.  © 2021 Elizabeth Acevedo.

Young sandhill crane foraging in corn field. © 2021 Elizabeth Acevedo.

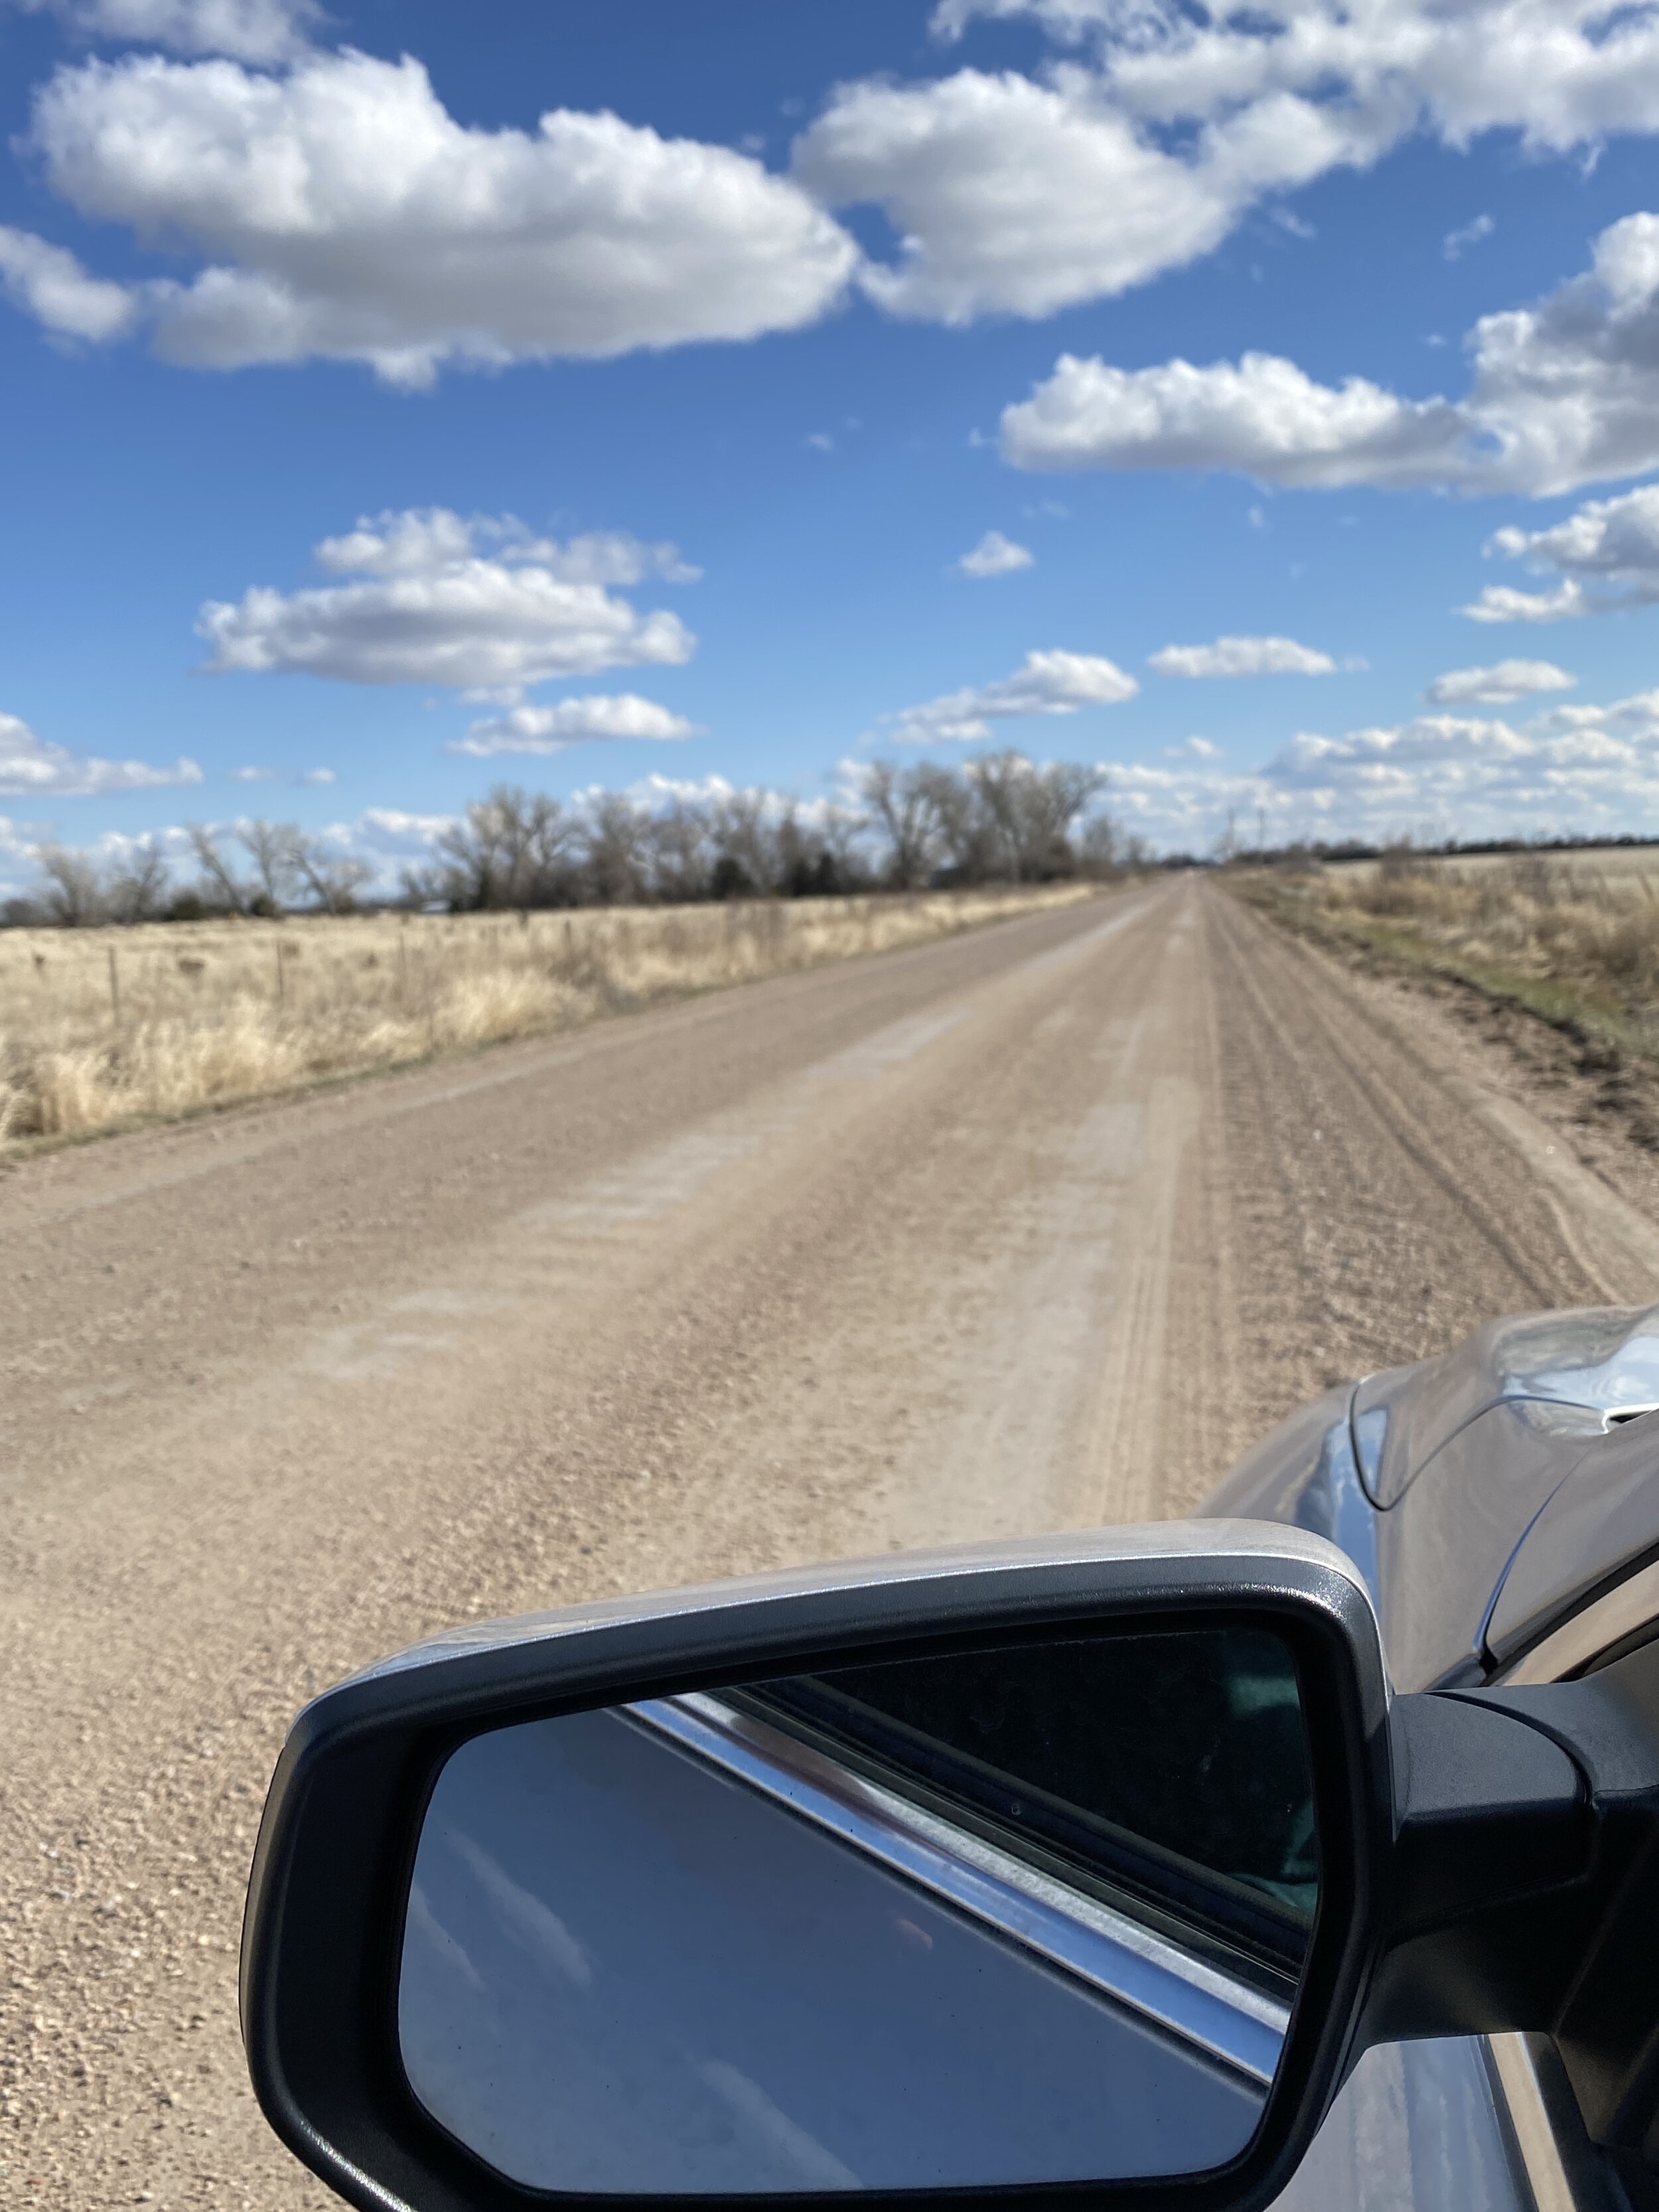
Backroad near Kearney, Nebraska (shot on iPhone). © 2021 Elizabeth Acevedo.

Backroad near Kearney, Nebraska (shot on iPhone). © 2021 Elizabeth Acevedo.

Sandhill cranes flying over Nebraska farmland in morning light.  © 2021 Elizabeth Acevedo.

Sandhill cranes flying over Nebraska farmland in morning light. © 2021 Elizabeth Acevedo.

So if you’ve been dreaming of witnessing one of the world’s great wildlife migrations, put Nebraska on your short list of places to visit!

In Travel, Photography, Birds Tags sandhill cranes, migration, Nebraska, midwest, travel, bird photography, spring migration, Platte River, summit workshops, photo tour, Rowe Sanctuary, Crane Trust
Fern-Plant-Closeup-Acevedo-040-LRc.jpg

Photography Exercise: Reconnect with Light

September 15, 2020

Have you ever become so focused on a creative goal that you develop tunnel vision and find yourself neglecting some of the photography fundamentals? That was where I recently found myself so I came up with a photography exercise to reset my brain. If you are looking to hit the restart button on your photography practice, you might want to give this a try too!

losing sight of photography’s core elements

A few years back, I fell unexpectedly in love with the wonderful but challenging genre of bird photography and became a little obsessed with the mastering the basics, i.e., finding the bird, getting it in the frame and locking in focus.  I became so single-minded in trying to accomplish those things that I started to let the core elements of any style of photography — light and composition — slip way down on my priority list. 

As I gained more experience with bird and wildlife photography, light and composition came back into the mix somewhat. But they still were not key players. It won’t be a big surprise when I tell you that I regularly came back from the field unsatisfied with my photos. Eventually, I forced myself to slow down, study my body of work, and consider why I felt underwhelmed by certain shoots. It finally became clear. I had been neglecting the most basic foundation of a beautiful photograph — light.

Composition could have used some attention too but, really, it was light that had all but fallen out of my consciousness. I used light only in the most utilitarian way and barely even considered it as a creative element. It may sound crazy to neglect something so basic. But my mind was stuck in a loop: find the bird, get it frame, lock focus, repeat. Embarrassing as it is to admit, that obsessive pattern lasted for YEARS! In case you have experienced anything similar, I wanted to share some of the exercises that I’ve done to shake out of that pattern and open up my creativity.

Self-Assignments CAN Help You reset your approach to making photographs

Determined to reconnect with the concept of light, I made myself go out with the camera — not at the fabulous times of morning or evening when good light comes easy, but in the middle of the day when light is notoriously harsh and uninspiring. My task was to follow the light and make a picture out of whatever subject I could find from there. On what looked like a pretty unremarkable stretch of a local nature trail, I focused on letting my eyes fall on any spot that had interesting light. It took a little while to get in the groove but, once I relaxed into the process, I started seeing things I would have otherwise missed. The images below are a few that I made while doing this exercise.

Green-Fern-Leaf-CloseUp-Acevedo-160-LRc.jpg
All photographs © 2020 Elizabeth Acevedo

All photographs © 2020 Elizabeth Acevedo

Fern-Branch-Closeup-Acevedo-082-LRc.jpg
Ant-Macro-Red-Flower-Acevedo-535-LRc.jpg

Even though I later thought of ways that I could have executed the ant and red flower photos better, they were a success to me though because the light led me to them and I relaxed into the process enough to actually see the tiny scene in front of me. The photo on the bottom right has a little sci-fi vibe to me, which is fun and not like anything else I have made in the past.

If you want to see more, I put together a short YouTube video I put together right after doing the exercise.

Reconnecting with light is a key goal that I keep in the front of my mind when I’m doing nature and wildlife photography these days. And when I start falling back into old habits - oh yea, it still happens! — I know that I just need to slow down and forget everything else until the light tells me where to go.

Takeaway Photo Tip: let One Fundamental photography Element guide Your field Session

The broader lesson is that, whenever you start to feel dissatisfied with your photographs, first, step back and consider whether you might be neglecting one of the fundamental photography elements — light, composition, or moment. If you have been (or even if you can’t put your finger on what’s missing), grab your camera, head out the door, and let one specific element lead you for an entire photo session. I suspect that you’ll be happily surprised with the results. At minimum though, I bet you will have a lot of fun just shaking up your process!

Check out this post for another self-assignment designed to break up your photography routine and start seeing more creatively again.

Want more photography inspiration? Sign up for the newsletter in the box below and I’ll share future posts about other creativity boosting ideas and other photography tips.

© 2020 Elizabeth Acevedo. All rights reserved.

In Photography Tags photography self-assignment, boost your creativity, creative photography, get out of a creative rut, photography tip, core element of photography, photo exercise, light in photography, creative inspiration, Elizabeth Acevedo Photography
Eastern bluebird captures an insect while foraging in fallen cypress leaves and grass, photographed with the Tamron 150-600mm G2 at 600mm f/6.3.

Eastern bluebird captures an insect while foraging in fallen cypress leaves and grass, photographed with the Tamron 150-600mm G2 at 600mm f/6.3.

Tamron 150-600mm G2 vs Canon 100-400mm L II Lens for bird photography

September 8, 2020

WHEN IS IT TIME FOR A NEW LENS?

Searching for a wildlife lens with more reach that won’t break the bank is a common quest for us bird and wildlife photographers.  That is exactly why, even though I love my Canon 100-400mm L II, I decided to try out the Tamron 150-600mm G2.

Nearly all of my bird and wildlife photographs have been made on the Canon 100-400mm.  It has been a fantastic lens with a lot of flexibility.  There are times though, especially with small birds, when 400mm just doesn’t get me close enough.

Using a teleconverter has been helpful to add some reach. The problems is that it works well in bright lighting conditions but is less than ideal in low light settings.  Adding a 1.4x teleconverter effectively transforms a 400mm f/5.6 into a 560mm f/8. That means the light coming into your camera is reduced by one stop.  If I’m photographing birds early in the morning or in the late afternoon when the light often is the prettiest, I want the ability to let the most light possible into my camera and the teleconverter hinders that.  I’ve also found that the autofocus becomes sluggish in low light when the teleconverter is on, tripping up some bird-in-flight opportunities. 

Most of time, if I cannot create a photo that I have envisioned, it is because I haven’t learned a particular skill yet or am not being imaginative enough in my approach. Every so often though, there are times that I hit the limits of my current camera gear. That is the time to consider adding or upgrading a piece of gear. So I started researching lenses, hoping to find one that gives me more reach at a reasonable price.  The Tamron 150-600mm G2 lens became a contender. 

As far as long lenses go, the 150-600mm G2 is very reasonably priced, currently around $1,400.  The Canon 100-400 II is priced about $700 higher, at $2,100, which is still in the “mid-priced” range for telephoto lenses. The fact that the Canon costs significantly more than the Tamron might make the comparison seem a little unfair.  But I have seen excellent quality images from talented photographers using the Tamron so it was worth a try.   

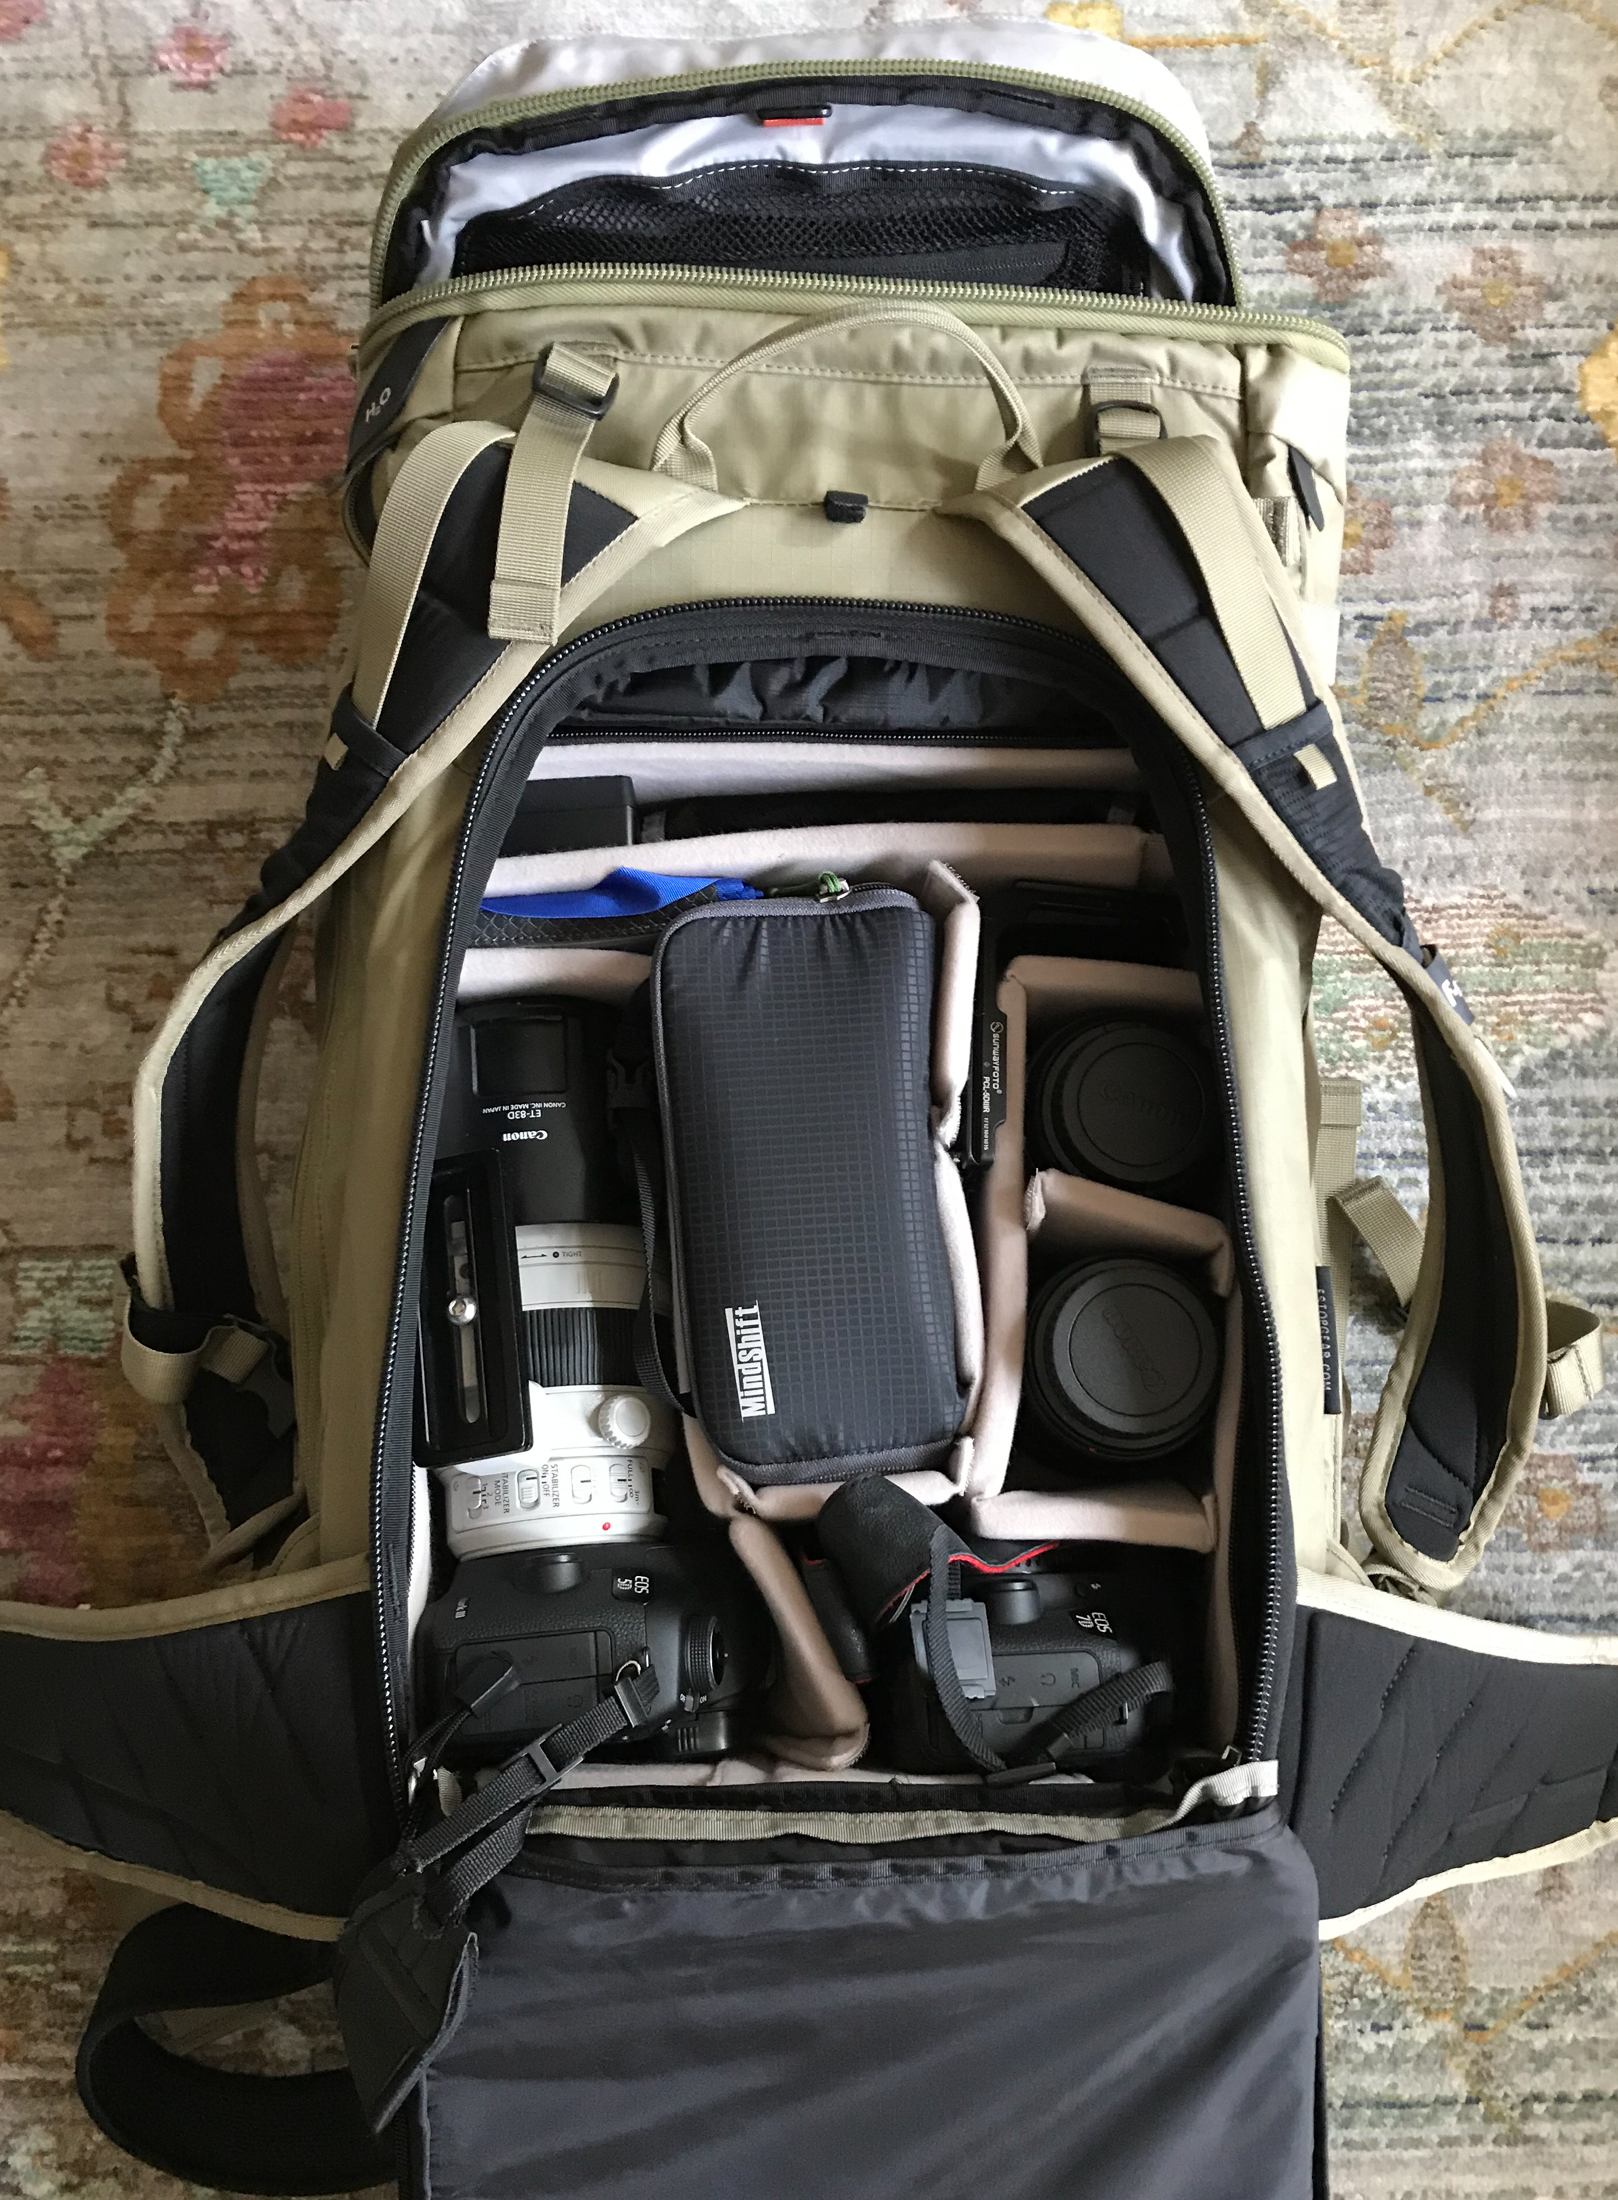
I also was interested in the Tamron because, like the Canon, it is relatively light and easy-to-pack for a long telephoto lens. Weight is important to me because I prefer to handhold whenever possible when I photograph birds.  I also want as much portability as possible when traveling, especially on planes.  The Tamron is listed at 4.4 lbs and the Canon is listed at 3.6 pounds.  Although the Tamron is a little bit longer than the Canon, it fits well in my medium-sized, 30L camera backpack.

TRYING OUT THE TAMRON 150-600MM G2.

I rented the Tamron for a week and set out looking for birds here in southeast Louisiana.  By the way, I am not a very techie person so this isn’t that kind of review.  These are just my personal experiences using the Tamron G2 and my thoughts on how it performed and any relevant differences that I noticed between it and the 100-400mm.  

The week that I had the Tamron was exceptionally gray and foggy for southeast Louisiana. One morning, I headed over to a small beach on the north shore of Lake Pontchartrain, looking for some shorebirds.  I was happy to find the least sandpiper and greater yellowlegs that you see in the photos below hanging out at the water’s edge. 

Least sandpiper, photographed with Tamron 150-600mm G2 at 600mm f/6.3.

Least sandpiper, photographed with Tamron 150-600mm G2 at 600mm f/6.3.

Greater yellowlegs, photographed with Tamron 150-600mm G2 at 600mm f/6.3.

Greater yellowlegs, photographed with Tamron 150-600mm G2 at 600mm f/6.3.

[Photo tip: if you are new to bird photography, try positioning yourself low so that you are at the bird’s eye level, which often creates a nice, intimate perspective.]  

There also were common loons on the lake, calling from behind the dense fog bank but they stayed hidden for the most part.  In my YouTube video about my week using the Tamron, you can hear the loons during the beach segment.  

I switched to the Canon to try to get some photos in the same conditions so I could do more of a side-by-side comparison but that plan flopped.  The shorebirds had flown off and did not return. The loons drifted even further into the fog. In other words, I had lost my subjects.  

TAMRON 150-600mm G2 vs CANON 100-400mm II for BIRD PHOTOGRAPHY: In this video, I compare the Tamron 150-600mm G2 lens with the Canon 100-400mm II lens. Havin...

The photos below are from the previous morning when I used the Canon 100-400 to photograph more cooperative loons and a great blue heron in the rain at a different spot along the lake.

Common loon in the rain, photographed with Canon 100-400 II at 400mm f/7.1.

Common loon in the rain, photographed with Canon 100-400 II at 400mm f/7.1.

Great blue heron in the rain, photographed with Canon 100-400mm II at 400mm f/6.3.

Great blue heron in the rain, photographed with Canon 100-400mm II at 400mm f/6.3.

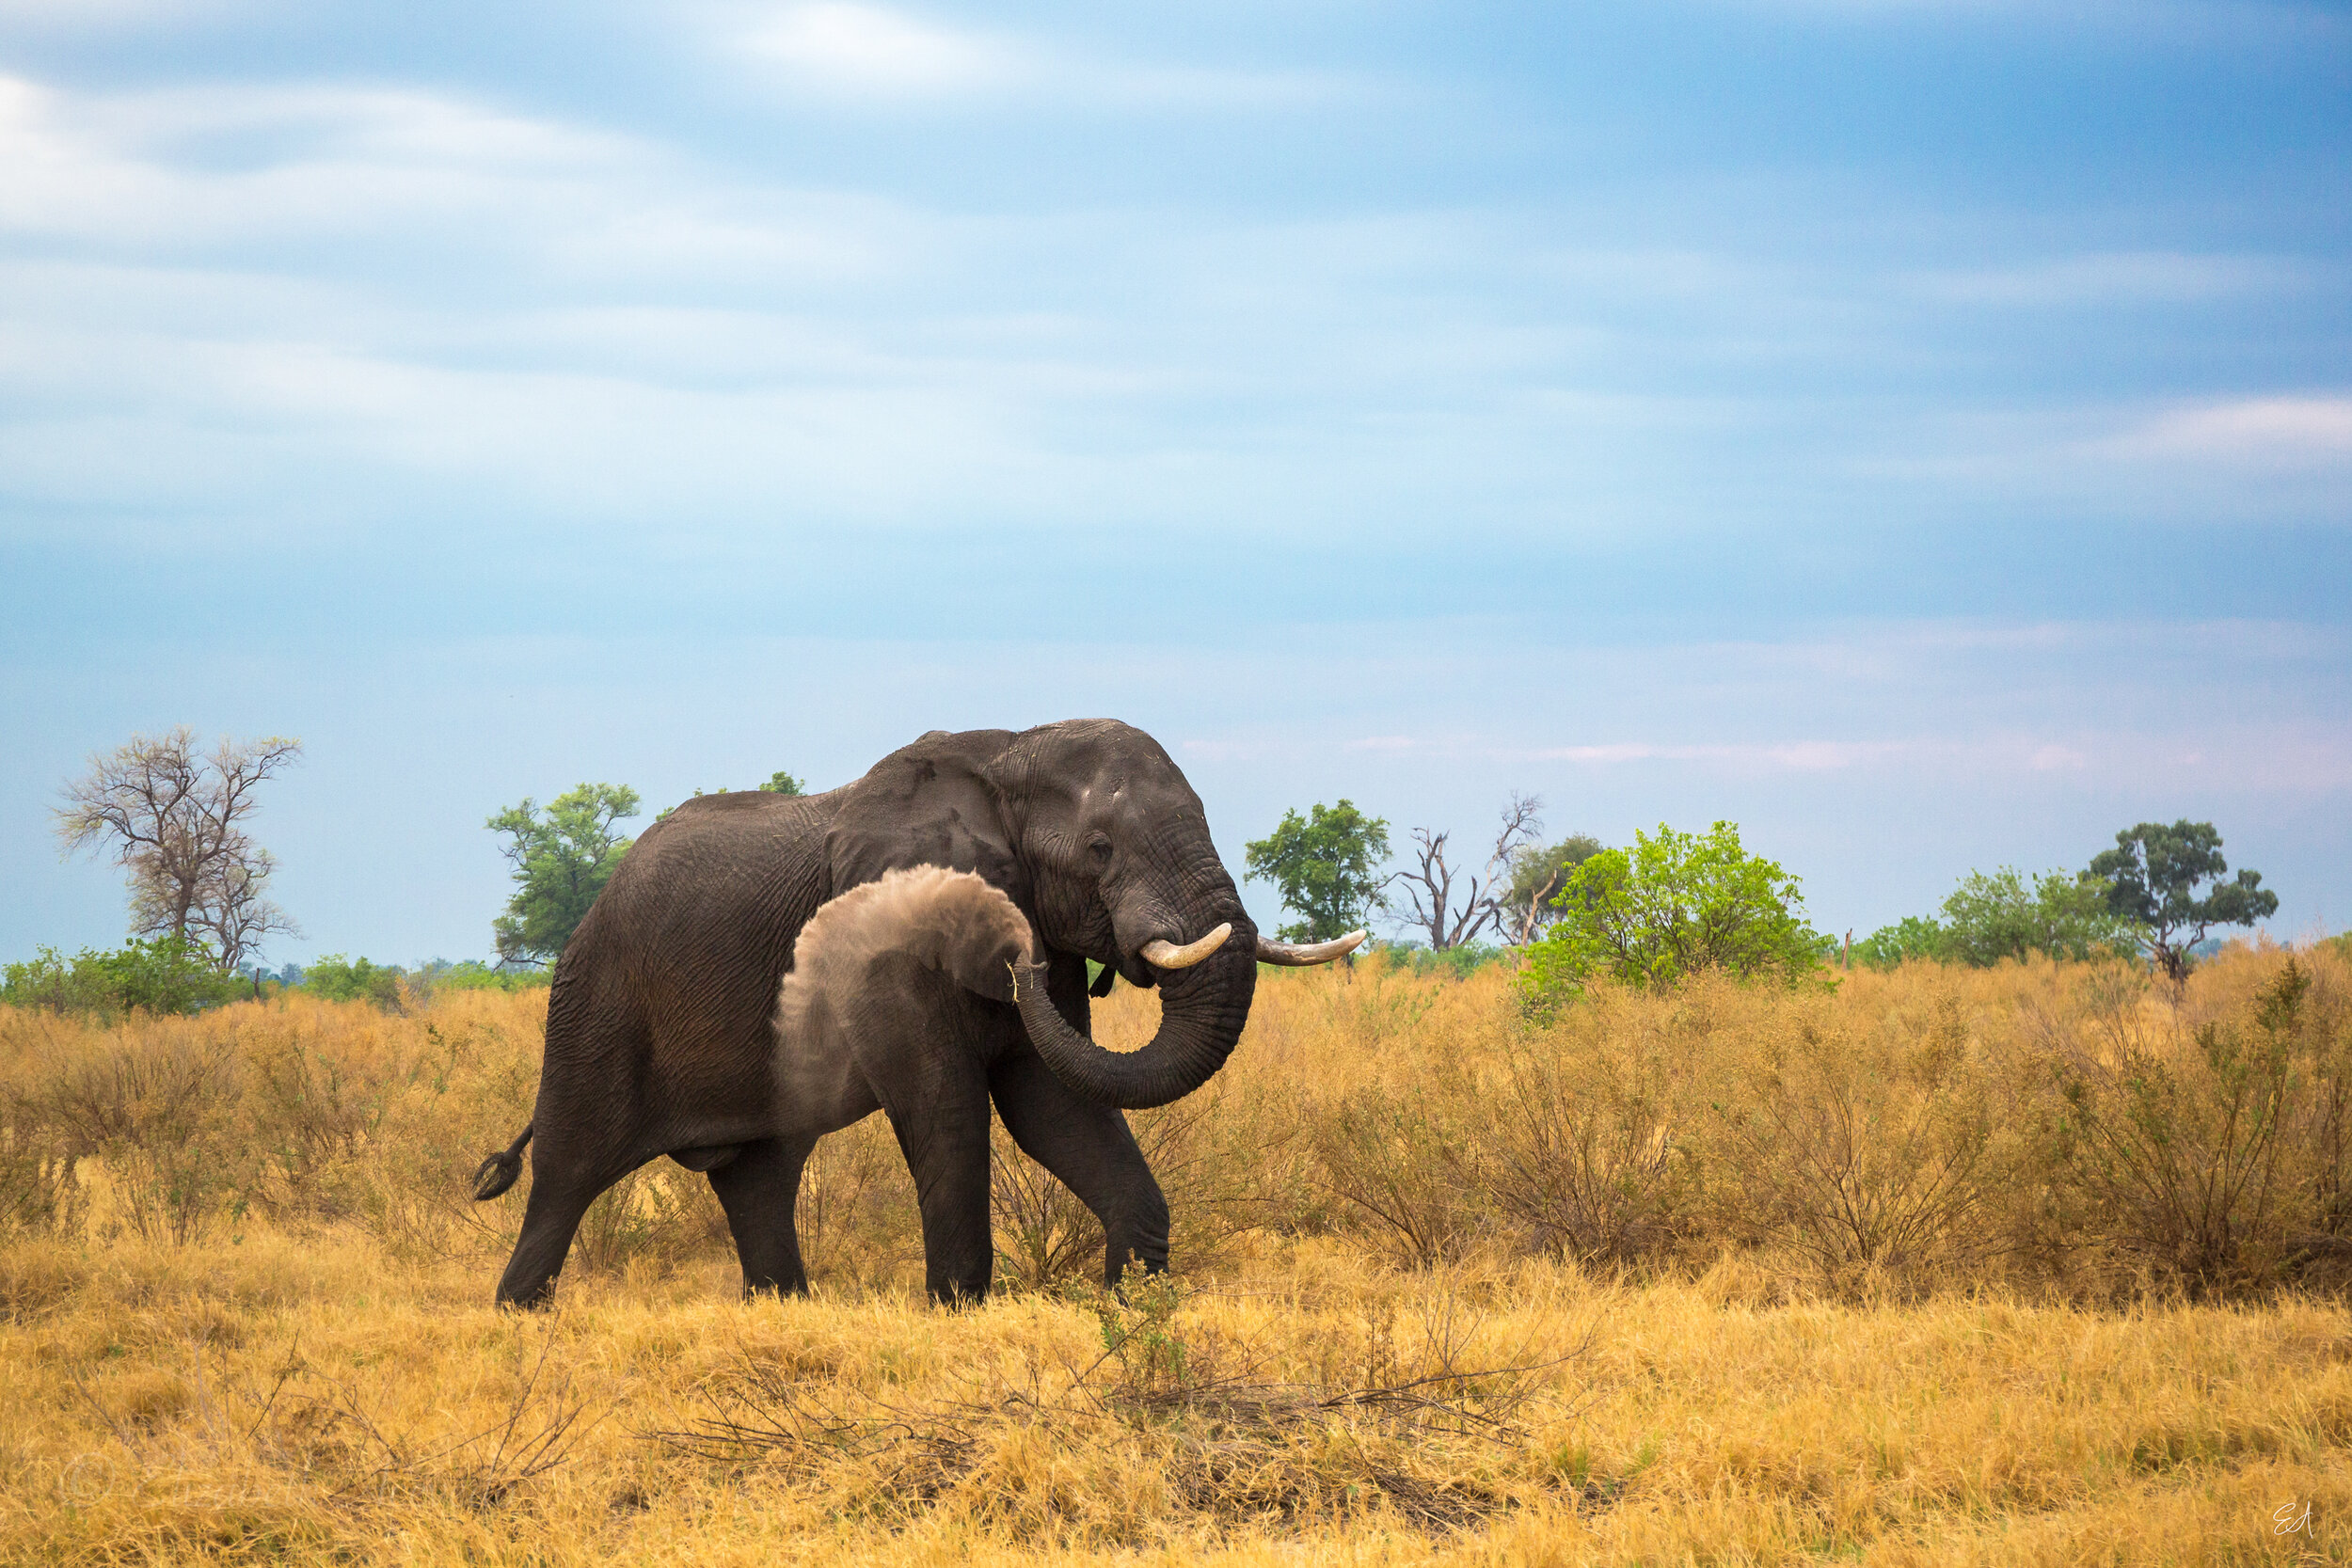
If you want to look through more images made with the Canon 100-400mm II, the photos on the Birds, Botswana wildlife (except the elephant spraying dust) and Osa wildlife galleries on my website are made with that lens. Here is one example.

Ruby-crowned kinglet perched on autumn cypress tree branch, photographed with the Canon 100-400 II at 400mm  f/5.6.

Ruby-crowned kinglet perched on autumn cypress tree branch, photographed with the Canon 100-400 II at 400mm f/5.6.

A few performance differences between Tamron 150-600 G2 and Canon 100-400 II caught my attention.  

I found that the Tamron has a slight lag in autofocus compared to the Canon.  The Tamron is certainly fast and works well. It is just that the Canon’s autofocus is super-fast.  Because small, quick-moving birds – think warblers and gnatcatchers – are one of my main interests and I often use autofocus to track them, I noticed the minor difference.  If your thing is mammals or other slower moving animals, you might not notice it all.  All that said, throughout the week, I was able to adjust my shooting to accommodate for the autofocus timing on the Tamron and made some images that I really liked, like the eastern bluebird photo at the top of this post.   

Another difference was that, in my experience with the two lenses, the Canon is a bit sharper than the Tamron.  I did not do an on-tripod, side-by-side comparison of a static subject, which would offer more accurate insight into the lenses’ sharpness.  These are just my takeaways from using both lenses out in the field in the way that I normally do. 

And to be fair, there are a lot of variables, usually associated with user error, that can affect how sharp our images are.  Because I like to hand-hold my camera and lens when photographing birds, my comfort and familiarity with the 100-400mm, which I’ve used for years, may have led to me getting sharper images with it than I did with the Tamron, which I used only for a week.  That said, I did shoot with the Tamron a lot that week and felt pretty confident that I was seeing a genuine, albeit slight, sharpness difference.  

The last, very minor issue was that I saw some vignetting (darkening around the corners of the image) with the Tamron, particularly at 600mm at the widest aperture, as you can see in the example below.  I really don’t knock the Tamron for it because, from what I have read, a little bit of vignetting is common with most super telephoto lenses.  I very rarely see vignetting with the Canon but it then only goes to 400mm.  Plus, a vignette is really easy to fix in post-production with Lightroom or Photoshop, which I ultimately did with the photo below.  

Note the vignette (darkening around edges of frame). Least sandpiper preening on beach, photographed with Tamron 150-600mm G2 at 600mm f/6.3.

Note the vignette (darkening around edges of frame). Least sandpiper preening on beach, photographed with Tamron 150-600mm G2 at 600mm f/6.3.

If I didn’t own the Canon already, which one would I buy? It depends.

Despite the minor differences I just discussed, in my opinion, both are great lenses and I would be happy to use either one.  

If affordability is key, the Tamron would be the better choice.  The $700 price difference is significant.  Please don’t let my comments here make you doubt the Tamron’s quality. If. you don’t watch him already, check out Morten Hilmer’s YouTube channel. He is an amazing wildlife photographer who uses the Tamron 150-600mm G2 (along with a high-end 600mm prime and other lenses) to make stunning images, like in his episode photographing mountain hares in the snow with the Tamron.

If cost isn’t the deciding factor and you can afford either lens, my personal preference would be the Canon 100-400mm L II.  Because I primarily photograph birds these days, including birds in flight, the slightly faster autofocus and sharpness make the Canon the lens for me.  Even though it would be very nice to have the extra reach of 600mm, I use a full-frame 30.4 megapixel camera and don’t mind cropping my images some to compensate for less reach. 

Will I switch to the Tamron 150-600mm from the Canon 100-400mm? No.

My situation probably is a little unusual because I am considering the Tamron while already owning the Canon.  Even with the extra bump to 600mm that the Tamron provides, I plan to keep the 100-400mm until I’m ready to invest in a prime (more on that below).   

What about the Sigma 150-600mm f/5-6.3 Sport? I haven’t tried it.

Sigma also has a 150-600mm f/5-6.3 Sport but I can’t comment on it because I haven’t tried it.  It is priced at about $1,850, making closer to the Canon 100-400 II’s price.  The Sigma is listed as weighing 6.29 lbs.  For me, that is a significant bump up from the Canon’s 3.6 lbs.  Everyone will have a unique view as to how much is too much weight, but, if I am going to carry that much more weight and need to use a tripod more often, my attention shifts over to prime lenses.  

If the few extra pounds isn’t an issue for you, I have read good things about the Sigma 150-600mm’s quality and it might be a lens you want to consider. 

Finally, whAT ABOUT A big prime lens? I am dreaming and scheming to get one.

As I just mentioned, if I’m going to work with a heavier kit, I want it to be worth it.  What “worth it” means will be different for each of us.  For me, it means gaining the advantages of a prime telephoto lens, such as improved image quality, wider maximum aperture, and better performance with teleconverters. 

The Sigma 500mm f/4 DG OS HSM Sport for Canon weighs about 7.3 lbs.  A prime with a maximum aperture of f/4, it would give me enough of a boost in quality and light to justify the extra weight and price, which I will get to in a second.  Plus, adding a 1.4x or 2x teleconverter has much more appeal when the result would be 700mm at f/5.6 or 1000mm at f/8.

But we are talking about a major jump in price from the zoom lenses just discussed.  And in this price tier, affordability becomes a huge factor for me.  The Sigma 500mm Sport sells for about $6,000 new. Yikes! The Canon 500mm f/4 L II is even lighter, weighing 7.0 lbs, and sells for $9,000 new. Bigger yikes!!  Finding a used version of either lens will lower the price some but, if the lens is in good condition, it still is a serious investment.

I’ve used the Sigma 500mm Sport and liked it a lot.  I have not used the Canon 500mm II but have no doubt that it is a beautiful lens.  Earlier this year, I rented the dream lens -- the Canon 600mm III -- and it lives up to the hype. It is a lightweight, absolutely gorgeous lens.  With a purchase price of $13,000 new, renting the 600mm did not leave me burning with unrequited love because buying it is not even vague option for me.  A used 500mm II is still out of reach for me, although getting closer to the realm of possibility.  My plan at the moment is to resist even trying the Canon 500mm (don’t want the temptation), maintain my happy thoughts about the lower-priced, great quality Sigma, and find a good used version of that when I am ready to buy.  

Wow! That was a lot of lens talk! I hope it helps if you are trying to figure out which wildlife and bird photography lens is best for you.

Spanish moss at sunset in Mandeville, Louisiana, photographed with Tamron 150-600mm at 600mm f/9.0.

Spanish moss at sunset in Mandeville, Louisiana, photographed with Tamron 150-600mm at 600mm f/9.0.

Tufted titmouse eating an acorn seed, photographed with Tamron 150-600mm G2 at 600mm f/7.1.

Tufted titmouse eating an acorn seed, photographed with Tamron 150-600mm G2 at 600mm f/7.1.

Blue-headed vireo singing its beautiful song, photographed with Tamron 150-600mm G2 at 600mm f/7.1.

Blue-headed vireo singing its beautiful song, photographed with Tamron 150-600mm G2 at 600mm f/7.1.

All images © Elizabeth Acevedo and may not be used without prior written permission. All rights reserved.

In Photography, Camera Gear Tags bird photography, telephoto lens, wildlife lenses, Tamron 150-600mm G2, wildlife lens comparison, lens review, bird lens, long zoom lens, Canon 100-400 L II, Tamron 150-600 vs Canon 100-400, reasonably priced wildlife lens, renting a lens, renting camera gear, Elizabeth Acevedo Photography, Louisiana photographer, female wildlife photographer
Waterfalls and iconic mountain at Kirkjufell in western Iceland’s Snaefellsnes Peninsula. © 2018 Elizabeth Acevedo

Waterfalls and iconic mountain at Kirkjufell in western Iceland’s Snaefellsnes Peninsula. © 2018 Elizabeth Acevedo

5 TIPS FOR A SOLO ROAD TRIP THROUGH ICELAND

September 3, 2020

Updated (initially posted July 2019)

I spent a week driving myself around the Western and Southern parts of Iceland early one summer. I would do it again tomorrow if I could, with a few adjustments. If you are thinking about a driving trip through Iceland, here are a few takeaways that might help you plan your trip.

1)    Dial down the pace of your itinerary

Whatever pace you are considering for your trip, I recommend slowing it down. Iceland lived up to all of the hype. It is a stunningly beautiful place and you’ll want to explore it. 

I realize that people have different travel styles.  Some like to see as much of a place as possible, ticking off the highlights in the guidebook, no matter how short the time.  Other people don’t mind seeing fewer places to have a more in-depth experience at each stop.  I usually fall into the second camp so my itinerary was slow-paced to begin with.  Still, once I was actually there, I found myself wanting more time at each spot.  

Iceberg chunks float out to sea at the black sand Diamond Beach in southern Iceland. © 2018 Elizabeth Acevedo

Iceberg chunks float out to sea at the black sand Diamond Beach in southern Iceland. © 2018 Elizabeth Acevedo

In Southern Iceland, a lot of the must-see spots are located right off of the Ring Road, making them easy to access.  As a result, when you look at the map and figure out driving distances, it seems like you can fit in a few, or even several, stops a day.  But what the map doesn’t reveal is that the locations are so beautiful, you won’t want to rush off.  I had to tear myself away from places like Diamond Beach (above) and Jokulsarlon glacier lagoon (below).

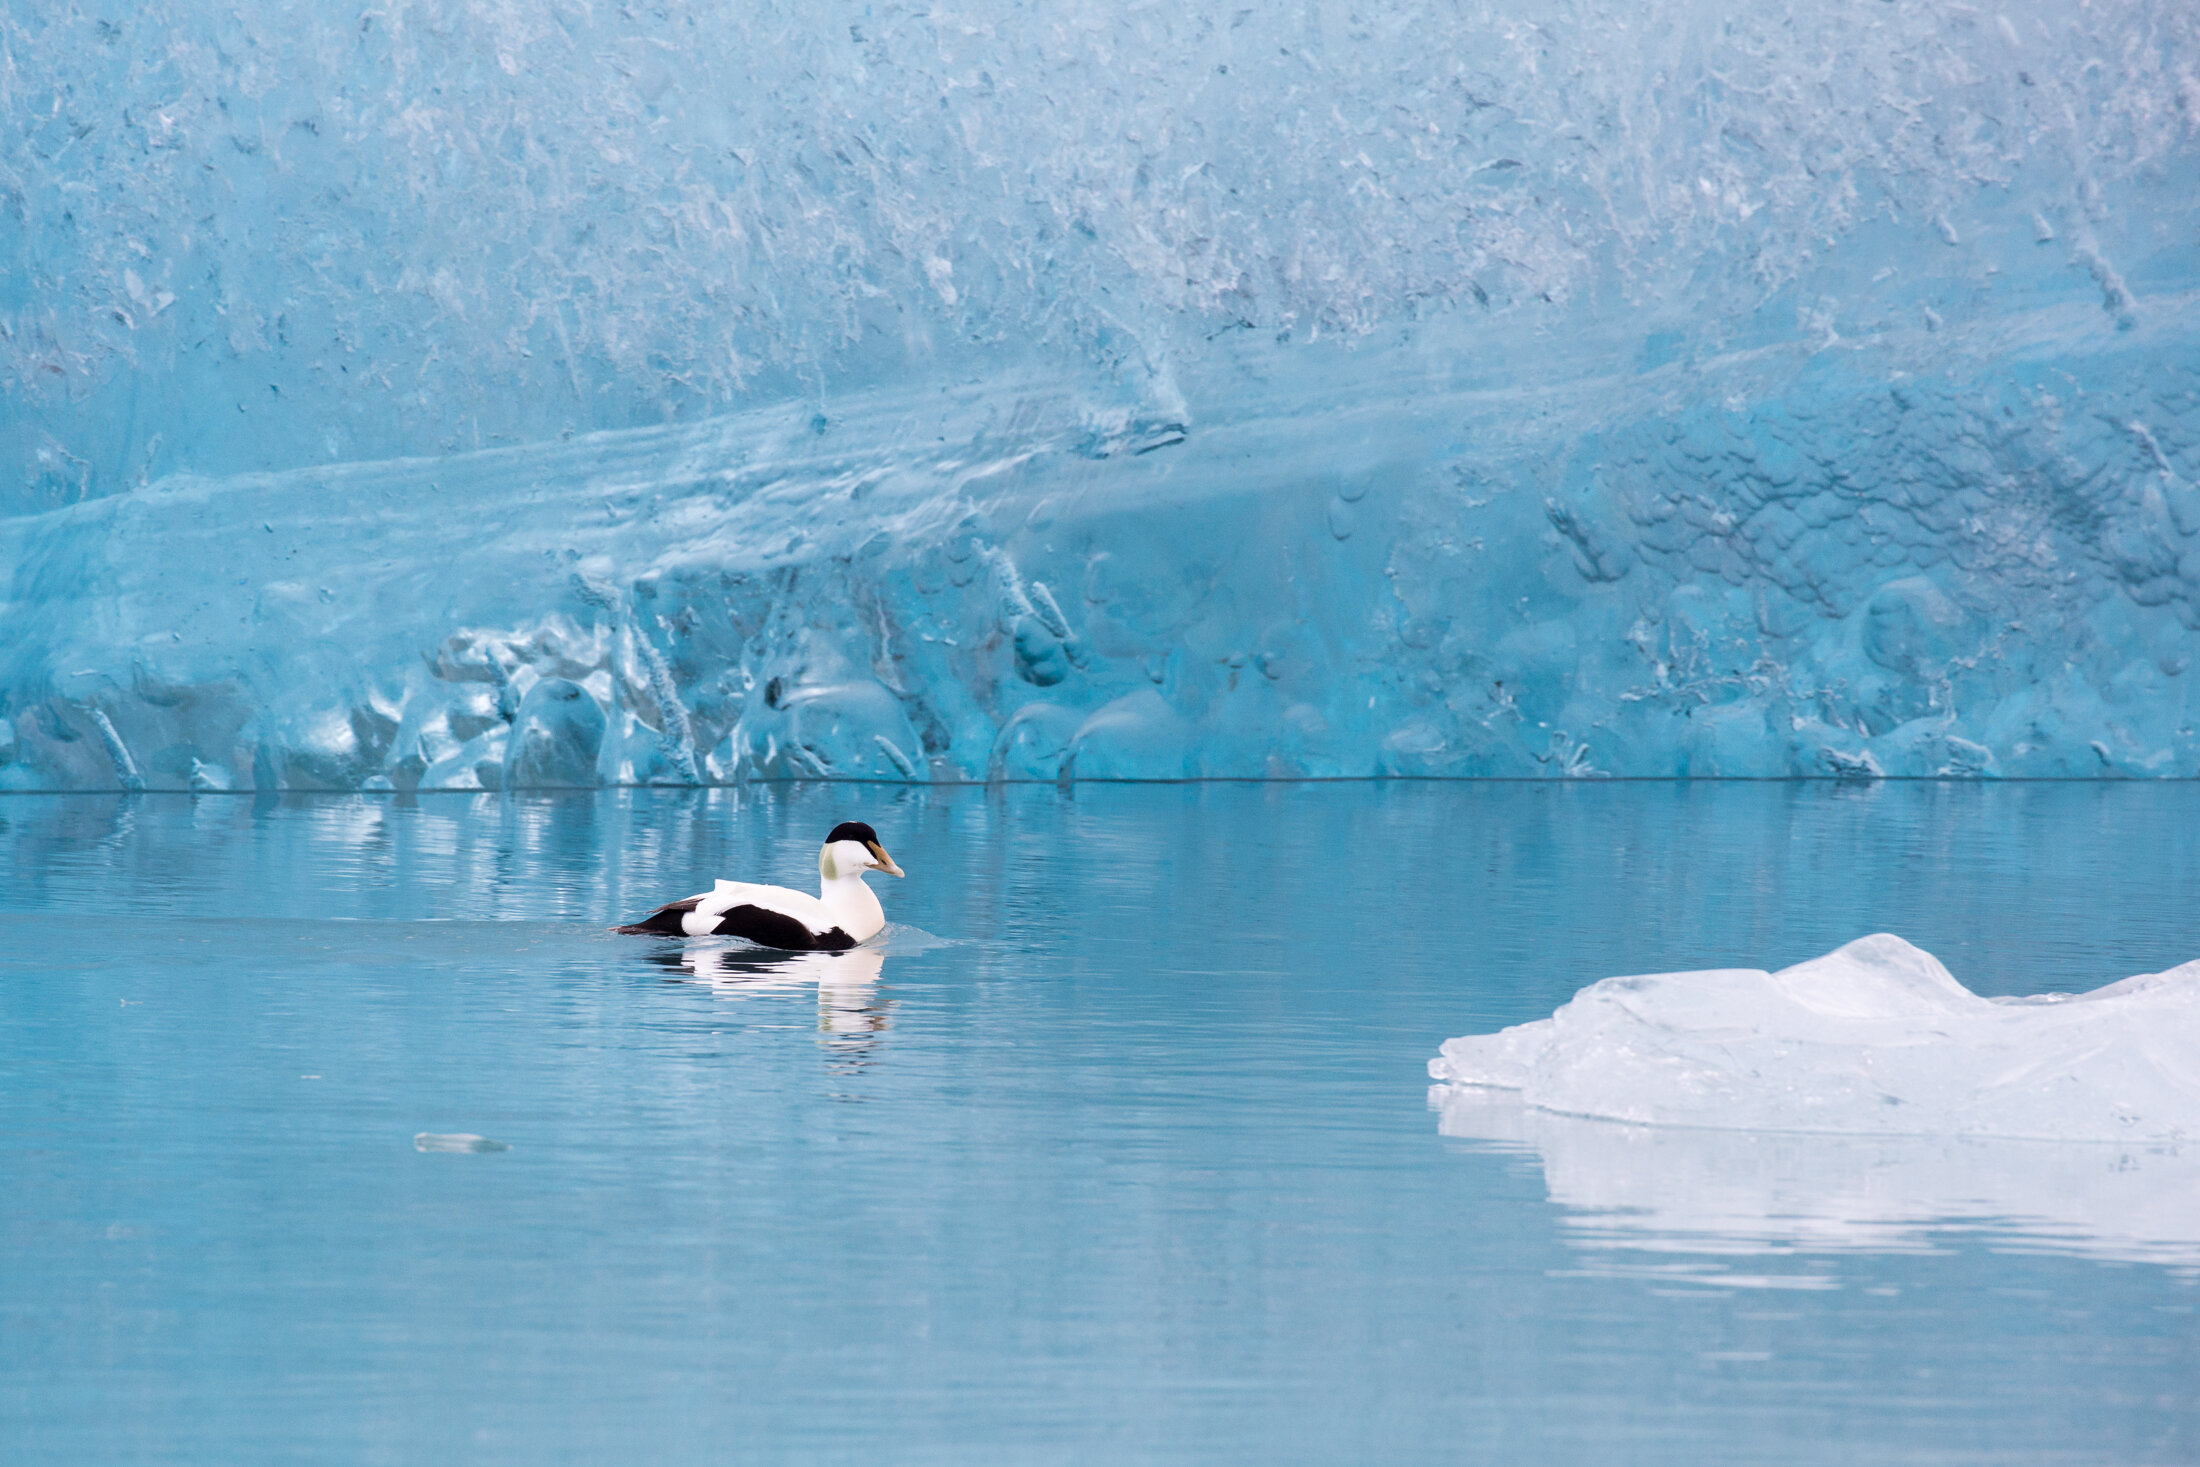
A common eider paddles near an iceberg at Jokulsarlon glacier lagoon in southern Iceland. © 2018 Elizabeth Acevedo

A common eider paddles near an iceberg at Jokulsarlon glacier lagoon in southern Iceland. © 2018 Elizabeth Acevedo

There also are tons of opportunities to take short (or long) walks and hikes around the other-worldly Icelandic landscapes. The picture to the right , for example, was taken on the easy walking path to the glacier’s edge in Skaftafell National Park, which has a seemingly endless array of trails of all lengths and levels of difficulty. When I planned my trip, I thought that I had allowed plenty of time for photography (my main interest) plus a few short hikes here and there, but the time almost always went too quickly.  

Also, having more time and flexibility than you think you’ll need can help when the fatigue of driving alone sets in.  Being tired and having no one to take over the wheel isn’t a great situation.  Days when I had extra time to stop for breaks were so much more comfortable and fun than the days that I planned things a little too tightly. And because the weather in Iceland changes frequently and dramatically, the driving conditions on any given stretch might be more difficult than you anticipated.  

One thing that limited my flexibility was that I booked my lodging in advance.  It’s just my preference when I travel alone to know ahead of time where I will be staying each night.  So, even though I’d still do it next time, I might do it differently.  The local inns tend to have limited check-in times, usually only until 7 or 8pm.  That meant that, each day, I had to arrive at the next inn by a certain time. With 22 hours of daylight, it was easy to loose track of time. Next time, I might stay for multiple nights in one spot or cover shorter total distances each day to alleviate some of the time pressure.  

2)    Spring for a few tech essentials – a portable wifi hotspot and local SIM card

Having a portable wifi hotspot made a huge difference while driving around Iceland. I really recommend having one with you.  I rented one when I arrived from Trawire at the Reykjavik airport but could have gotten one through my rental car company, which would have been easier.  The hotspot meant I was able to use google maps everywhere I went.  It also allowed me to text and call with WhatsApp, and email when I was away from the guesthouse or hotel wifi, which was most of the time.  

Couple hiking at Skaftafell National Park, Iceland. © 2018 Elizabeth Acevedo

Couple hiking at Skaftafell National Park, Iceland. © 2018 Elizabeth Acevedo

Staying connected on vacation may not seem very appealing if you are trying to relax and enjoy the travel experience.  When traveling alone though, being able to reach people, even if strictly for safety reasons, is pretty essential.  Which brings me to my next point …

I opted not to get a local SIM card for my cell phone but really wished I had.  I decided not to get one because I had read that people were able to get cellular service with Verizon’s international plan.  That was not my experience.  I actually got zero cell service the whole time I was in Iceland.  I probably wouldn’t have noticed or cared except when the battery died in the rental car and I discovered that I could not call the local rental car company or anyone else locally for help.  I was lucky in a lot of ways: it happened right outside of my guesthouse, during work hours, the manager was there and kindly called the car company for me, and the mechanic in the little town happened to be just around the corner.  I lost a few hours that morning but that was the worst of it.  There were any number of other times when I was at somewhat remote locations at very odd hours to catch sunset or sunrise with only maybe one or two other photographers around, if anyone.  Having car trouble at any of those places with no cell service would have been much more complicated.  With the wifi hotspot, I could have emailed or texted through WhatApp someone somewhere and asked them to contact local help, but who knows when I actually would have reached someone.     

Go for the portable wifi hotspot and the local SIM card.

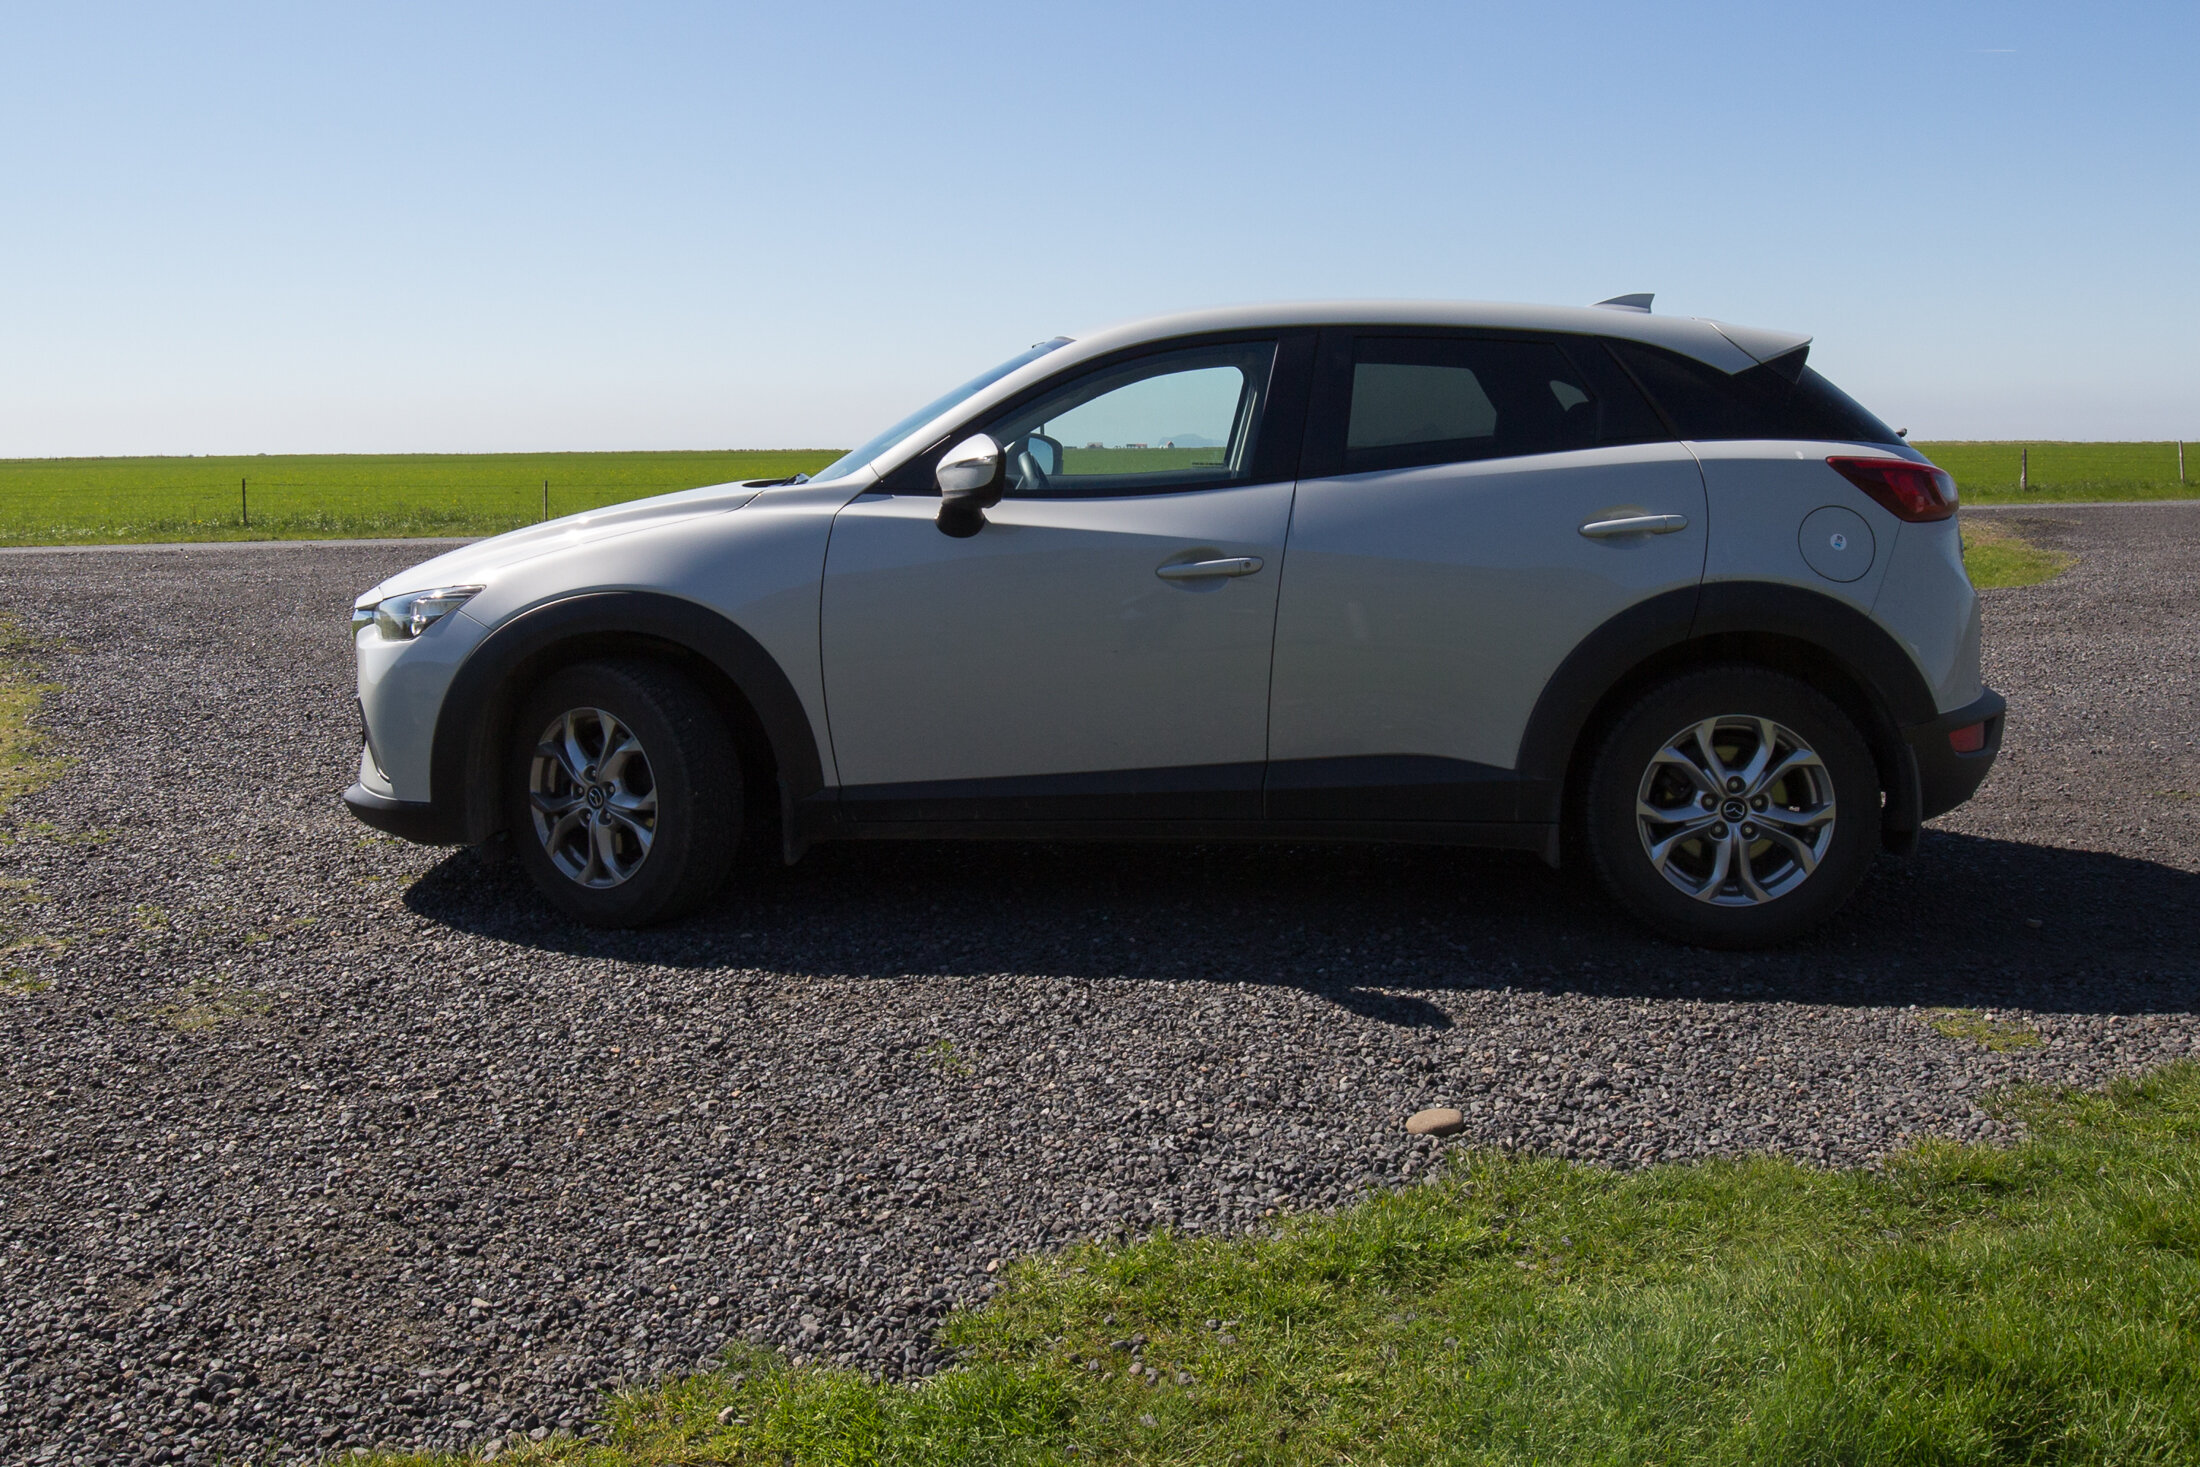
The Mazda CX3 rental car performed well on Iceland’s main roads. © 2018 Elizabeth Acevedo

3)    Get a little more car than you need 

For seeing the main sights on or near the Ring Road, a regular rental car was totally sufficient.  I opted for all-wheel-drive, which added some peace of mind and, in my opinion, was worth the extra cost.  Some of the popular tourist sites are on rugged gravel roads, even if they are just off the main highway.  And as mentioned, the weather changes often and quickly.  I found myself driving through light snow and sleet on a mountain pass one evening and returning over the same pass the next day in bright sunshine on clean roads.  I didn’t end up using the all-wheel drive but was glad to have a little extra control just in case.

4)    Stay at guesthouses and small inns along the drive

You will find lots of guesthouses and small inns along the drive but very few big hotels.  The inns that I tried were all very comfortable, clean and moderately priced.  All of them were in great locations and had views that ranged from pretty to jaw-dropping beautiful.  My favorites were the River Hotel in Hella and Littli Geysir near the Geysir (although the latter might not be small anymore as there was a new building going up while I was there).  

As I mentioned, be sure to pay attention to the latest time that you can check-in.  They are small operations and don’t have a 24-hour reception desk. Also, it seems that most inns offer breakfast but do not have a full restaurant for lunch and dinner.  Littli Geysir and Hotel Smyrlabjorg were exceptions with nice, casual restaurants that served dinner.

5)    Be ready for one-lane bridges and sheep

The Ring Road and other main roads were well-maintained and easy to drive.  One minor exception was the one-lane bridges, especially on the southern part of the Ring Road.  There are small waiting areas on the shoulder just before the bridge to let oncoming cars pass and then you take your turn crossing the bridge.  It can feel a little dicey if traffic is moving quickly and cars in either direction arrive at the bridge at the same time.  By the end of the trip, I had gotten used to navigating them.  I thought I’d mention them here though so they don’t take you by surprise. 

Speaking of surprises, the sheep that dart, or just mosey, across the highway will keep you on your toes.  Sheep crossed my path from time to time throughout my drive.  All I could do was keep an eye out for them.

The one lane bridge at Jokulsarlon crosses over the glacier lagoon in southern Iceland. © 2018 Elizabeth Acevedo

The one lane bridge at Jokulsarlon crosses over the glacier lagoon in southern Iceland. © 2018 Elizabeth Acevedo

Copyright © 2019 Elizabeth Acevedo. All rights reserved.

Dry-Leaf-LIght-Closeup-Acevedo-056.jpg

PHOTOGRAPHY CHALLENGE: LIMIT YOUR GEAR TO EXPAND CREATIVITY

June 23, 2020

RECOGNIZING WHEN A HABIT IS WEIGHING YOU DOWN

Habits are a funny thing.  They can sneak in and take hold without us even realizing it.  Only recently did I discover that a stubborn habit has taken hold and is preventing me from moving my photography in the direction that I would like it to be going.   

I have come home from a lot of photography outings lately feeling dissatisfied with my images. The process of taking photographs involves a lot of elements – composition, light, color, subject, purpose, location, gear selection and so on.  We make choices, with varying degrees of intention, regarding each element in every photograph that we create.  When I stopped to examine my own process, I realized that it has become a matter of habit, rather than intention.  And I think the problem lies right there.  

Even though my relationship with photography spans two decades, I only started photographing wildlife in the past five or six years.  Birds became a favorite subject, in part, because they are more accessible than other wildlife and are challenging to photograph (at least for me).  I began by spending endless hours just getting the basics down, like tracking a fast-moving subject and quickly adjusting for changed lighting as the bird moves across a scene.  Lots of dedicated practice generally is great and necessary so that the mechanics of taking a photograph becomes second nature.

Elizabeth-Fontainebleau-Beach-screenshot-001.jpg


What I did not anticipate though was that all that time spent practicing created a surprisingly hard-to-break habit.  Even though my bird photography skills are pretty solid now, I find myself still engaging in the same photographic process on nearly every photo outing.  

I go out with my 100-400mm lens at the time of day and to the location at which I am most likely to find smaller birds.  When I see a bird moving in the trees or flying past, I find it in my viewfinder, grab focus, slightly adjust composition and hit the shutter.  I predictably come home with similar looking images every time.  And if I were happy with those images, there would be no problem.

That is not the situation though. For quite a while, I have been longing to apply a more artistic style to my images, to go beyond the usual documentary-style bird pictures.  Sometimes I succeed and tap into more creativity to make a photograph that I truly love, like the sandhill crane image above.

Overall though, desire alone has not provided the motivation that I need to change my approach on a consistent basis.   I had to dig deep to recognize that my process itself had become a fairly rigid and limiting habit.  Just wishing it away was not working so I decided to assign myself little creative challenges, changing one or two elements of the process and forcing a break in the routine.  This is how my first challenge went …

PICK JUST ONE LENS (NOT YOUR FAVORITE ONE) AND GO PLAY

The exercise I chose is a simple one that many photographers have suggested over the years: go out with only one lens.  I added the restriction that it had to be a lens other than my favorite, most used lens. Also, because a zoom provides so much flexibility, I restricted myself to just one focal length. I chose a prime 100mm macro lens, but if you do not have a prime lens, just pick one focal length and stick with it.  The idea is that limiting our gear lets us focus more on composition and light and encourages us to see in a fresh way.  And choosing a different lens from the one that we normally use forces us out from our routine.

I have to share with you that I totally failed on my first session trying this exercise.  I went to a local walking trail, ready to get creative, but with my favorite 100-400mm lens still in my bag, confident that I would not touch it.  After walking around for about five whole minutes, I got frustrated when there was no immediate rush of cool new photo ideas.   So, with an embarrassing degree of impatience, I went back to my old tricks, put the long zoom lens on my camera and went looking for birds.  Even if you have much more willpower than I have, I highly recommend actually leaving all other lenses at home.  

After that minor set-back, I ventured out for round two. 

Leaves-on-Ground-Closeup-Acevedo-006.jpg

This time, I left the long lens at home and headed off with my much-lighter-than-usual backpack to a nearby state park.  Knowing that my favorite lens was not even an option, my eyes adjusted and began seeing subjects and situations that I normally would have bypassed.  

Not far down the trail, I noticed sunlight bouncing into the piles of fallen leaves and backlighting a few leaves still on the trees. I stopped to make a few images, just letting myself play. 

As I kept meandering along the path, a set of tiny mushrooms in a patch of moss caught my eye.  In hindsight, I wish that I had spent a lot more time with the cute little mushrooms and really “worked the scene,” as photographers like to say. I looked for them again a few days later but they already had disappeared.  

Tiny-Mushrooms-Closeup-Acevedo-023.jpg

On a different evening, I stopped at a local greenspace just after sunset with only the 100mm.  I really intended just to have a look around because I was due to be home soon and the light was nearly gone.  But, after spotting a few raindrops catching light on a rose, I decided to try to capture a few images.  Although an intentional “nighttime flower abstract” shoot would produce more refined final images, I ended up loving the dark, moody look in these quick experimental photos. The look is something that I want to explore more in the future and probably would not have occurred to me if I had not done this creative challenge. 

The key thing about this self-assignment is that it is not about capturing stellar, portfolio-worthy images.  It is about breaking a habit and permitting ourselves to play. 

To my happy surprise, doing this simple exercise really did start the flow of new ideas about different techniques and subject matters.  As I am writing this though, I realize that my usual photography process is based on such a stubborn habit that it creeps right back the second that I stop paying attention.  So, until experimenting on photo shoots becomes the new habit, I will keep scheduling these fun self-assignments. 

You can come along on a few of these creative challenges on my YouTube channel Elizabeth Acevedo Photography.  Here is the video I made about doing this exercise.


If you also are struggling to climb out of a creative rut, why not try the exercise for yourself?  Whether you are a photographer, musician or any other type of artist, just limit your toolbox for one session, day or even a whole week.  Grab one piece of gear that you normally do not use and just play and create without expectation.  By shaking up the routine even a little bit, I bet that you will notice fresh ideas popping into your wonderfully artistic mind.

Rose-Rain-Lights-Closeup-Acevedo-.jpg

Images and content copyright © Elizabeth Acevedo. All rights reserved.

Elephant spraying dust on a hot afternoon in Botswana - © 2016 Elizabeth Acevedo

3 WILDLIFE TRIP IDEAS FOR SOLO TRAVELERS

May 27, 2020

Updated (Initially posted July 2019)

Combining two of my favorite things - solo travel and wildlife photography - can be a little tricky.  To photograph animals and birds in their natural habitat, we have to be in it.  And for someone like me who has no wilderness skills, going deep into wild areas alone is not the best idea for a lot of reasons.  I know that there are skilled, experienced adventurers out there who can handle long solo hikes and camping safely.  I also know that I’m not one of them.  

So when planning a trip to a wildlife destination to photograph (or just view) animals, what are some options for the non-wilderness-expert, nature lover? Here are three types of trips that have worked for me.

Lion mother kissed by her cub, taken on a photography safari in Botswana. © Elizabeth Acevedo

Lion mother kissed by her cub, taken on a photography safari in Botswana. © Elizabeth Acevedo

1) Join up with a tour or workshop for part of your solo trip.

Even if you spend the main part of your trip on your own, meeting up with a group for a specialized wildlife photography tour or workshop can be a great option.  I had a great experience doing this a few years ago in Botswana and South Africa. I started and ended my trip with solo visits to Johannesburg and Cape Town and, in the middle, joined a photography-specific group safari in Botswana’s Okavango Delta.  

Tours and workshops can range from basic to full service. On the simple side, the trip leader plots out the best locations to shoot each day and meets or drives you there. On luxury tours, the leader manages all of the travel planning, shoot locations, transportation and meals from start to finish. Whatever the level, having someone else handle the sometimes complicated logistics around wildlife photography is a real advantage. 

Sunset at Sandibe camp in the Okavango Delta. © Elizabeth Acevedo

Sunset at Sandibe camp in the Okavango Delta. © Elizabeth Acevedo

Another plus is that you will be with other people who share your interests and will get up early with you and stay late at a location for the best light. No one is trying to rush back for dinner.  Although leaders and group participants will vary, there likely will be good opportunities to learn about photography, animal behavior, or the area you are visiting.  

A safari vehicle in the Okavango Delta, Botswana. © Elizabeth Acevedo

A safari vehicle in the Okavango Delta, Botswana. © Elizabeth Acevedo

One of the downsides of a tour or workshop is it generally comes with a higher price tag than other types of travel. Of course, the extra cost may be completely worth it if the photographer leading the trip is someone whose skills you admire, the leader is very knowledgeable about a particular location or animal, or you really prefer to have everything planned for you so you can focus on the wildlife.  The higher price tag is just something to consider as you plan.  

Another potential disadvantage is that you will be following a set itinerary that someone else arranged.  The schedule, for example, might slot a full day of macro insect photography when your real interest is photographing mammals.  Some trips will offer optional activities or build in some flexibility to do your own thing. A little research and asking questions before you book should help you figure out what your options will be. 

Also, popping onto a trip with strangers means you never know what the group dynamic will be.  You might find yourself with people who aren’t good travel or photography buddies for you.  On the flip-side, the group might a fun and easy-going bunch and you end up making some new friendships that last well beyond the trip. 

2) Choose a well-situated lodge that offers wildlife viewing opportunities and some support.

The next style of trip offers more of a true “solo travel” scenario and requires a bit more research in exchange for more scheduling flexibility. Option 2 is to book a stay at a lodge that is situated in a way that it is possible to photograph wildlife on your own while still providing some support for you.  This was what I did for a recent trip to Costa Rica.  After researching and reading a lot of reviews, I decided on Bosque del Cabo, a small lodge on the Osa Peninsula known for its sustainable practices and an expansive, mostly undeveloped property. The lodge’s property includes primary and secondary rainforests edging up to the Pacific Ocean, which results in abundant wildlife viewing opportunities.  Although it isn’t a budget option, traveling solo to a place like Bosque del Cabo made my travel funds stretch farther than a fully guided tour and offered a ton of freedom.

Squirrel monkey eating a katydid under the shade of a primary rainforest on the Osa Peninsula, Costa Rica. © 2019 Elizabeth Acevedo

Squirrel monkey eating a katydid under the shade of a primary rainforest on the Osa Peninsula, Costa Rica. © 2019 Elizabeth Acevedo

Spider monkeys eating mangos in Costa Rica. © 2019 Elizabeth Acevedo

Spider monkeys eating mangos in Costa Rica. © 2019 Elizabeth Acevedo

From my open-air cabin, I could hike any of several well-maintained trails on the property and maybe see one other person, if any, while staying within a close distance to the lodge.  The lodge recommended leaving word with a staff member when going on a longer hike alone. Hiking really was optional though because most of the wildlife that I saw and photographed were on or around the trees close to the lodge and cabin areas.  The local trees were producing tons of fruit and nuts – coconut, almond, peach palms and mango, from what I could tell – so the animals and birds were making the most of it.  

An important factor for me when choosing where to stay, the lodge follows conservation best practices by not feeding any of the wildlife.  As a photographer and animal lover, I try my very best (as do many wildlife and conservation photographers) to observe and photograph wildlife without disrupting their normal behavior or causing them stress. 

Another advantage of the small lodge experience is that it can be a good middle ground if solo travel appeals to you but you are worried about feeling too isolated. Bosque del Cabo, for example, has a maximum capacity of 50 guests, according to its website. During my stay, there were maybe 15-25 other guests – including four solo travelers besides me.   The cabins are fanned out around the property so there is no chance of feeling crowded.  At the same time, socializing is easy as dinners are communal (unless you request otherwise) and people tend to gather at the bar an hour or so before dinner.  The staff members are warm, friendly and always ready for a chat too.  

If even short hikes alone sound daunting, the lodge offers some short tours so you can get the lay of the land before you venture off on your own. The lodge has a resident naturalist who leads group hikes and is a wealth of information about the primary forest and its inhabitants.  Two birding trips also are available with a local expert. 

From a photography standpoint, something that can be a pro or a con is that the photography planning is all up to you. Unlike being on a tour or workshop, you alone are in charge of figuring out the best locations, understanding animal behavior and being disciplined to get out in the best light and make your images. If you aren’t good at one or more of those steps, the photos may not be as good as those you’d get with a seasoned guide. But you have total freedom to plan what, when and where you want to shoot.

3) Travel on your own to the destination and then find a private local guide when you arrive.

One more option is to travel solo to your destination and hire a local guide once there to show you to the best wildlife viewing spots.  Although I have not tried this for an entire trip, I did this to tour a mangrove on a previous trip to Costa Rica a few years ago.  I was traveling with friends but the whole group planned a day of deep sea fishing, something I wasn’t interested in.  The small, family-run company that managed our rental house recommended a private guide to take me through a nearby, protected mangrove by boat.  The young guide was incredibly knowledgeable about birds and the mangrove environment and helped me get some of my first bird photographs.  The cost was very reasonable and, if I had not been with friends, I likely would have booked more day trips with him.

I am generally a cautious traveler when visiting a place on my own and, for one-on-one excursions, will use a guide only if the person is recommended by people whom I trust or who have some investment in my safety, like local hotel and lodge operators. Also, I didn’t know to ask back then but, today, I would inquire about the guide’s policy regarding wildlife tourism ethics to make sure he or she puts the animals’ wellbeing above a tourist’s desire to get a picture. 

Red lored parrots on the Osa Peninsula, Costa Rica. © 2019 Elizabeth Acevedo

Red lored parrots on the Osa Peninsula, Costa Rica. © 2019 Elizabeth Acevedo

A ranger talks to visitors as Ridley turtles come ashore to lay eggs. © Elizabeth Acevedo

A ranger talks to visitors as Ridley turtles come ashore to lay eggs. © Elizabeth Acevedo

It might take a little more research and chatting with people to find the right person or company but using a good local guide supports the community you are visiting. Plus it can be a way to keep your total travel costs down. 

I hope these ideas inspire you to start planning that next solo adventure to see some of the earth’s beautiful wildlife. 

Copyright © Elizabeth Acevedo. All rights reserved.

Tags wildlife, solo traveling, wildlife photography, nature photography, safari, Botswana, Costa Rica, dream destinations, travel tips
A thatched roof cabin at an eco-lodge in Costa Rica’s Osa Peninsula.  © 2019 Elizabeth Acevedo

A thatched roof cabin at an eco-lodge in Costa Rica’s Osa Peninsula. © 2019 Elizabeth Acevedo

RECHARGING IN THE RAINFOREST

May 26, 2020

(Updated, original post July 2019)

Zip lining and surf lessons might be what a Costa Rica vacation brings to mind. But sometimes just being immersed in nature is enough.  

At the southern tip of Costa Rica, the Osa Peninsula is known for its large expanses of rainforest and the abundant, diverse wildlife that thrives in it. The quickest way to get there is taking a short prop plane ride from San Jose’s international airport to the small coastal town of Puerto Jimenez.  Weather permitting, the 45 minute flight can offer spectacular views of the Pacific coastline and the Osa Peninsula’s lush landscape before touching down on the dirt runway in Puerto Jimenez. 

That is where I landed on a recent trip to the Osa. My final stop though was a small lodge about a 40 minute drive away from town at the southernmost point of the peninsula.  Just outside of town, the road becomes a rocky, unpaved path that traverses a couple of small (in the dry season) streams and winds along the lush, tropical landscape that makes everything else seem far away. 

A toucan calls from its perch on the Osa Peninsula.  © 2019 Elizabeth Acevedo

A toucan calls from its perch on the Osa Peninsula. © 2019 Elizabeth Acevedo

The trip was supposed to be devoted to personal photography work.  I have been trying to explore new, more artful directions in my photography so I traveled solo to have some uninterrupted creative time.  As it happened though, the day job had cranked up to full intensity in the month or so prior, particularly the days leading up to the trip. I arrived in Costa Rica pretty spent.  As a result, I did spend some time photographing birds and wildlife but my efforts felt scattered and a little bit on autopilot. 

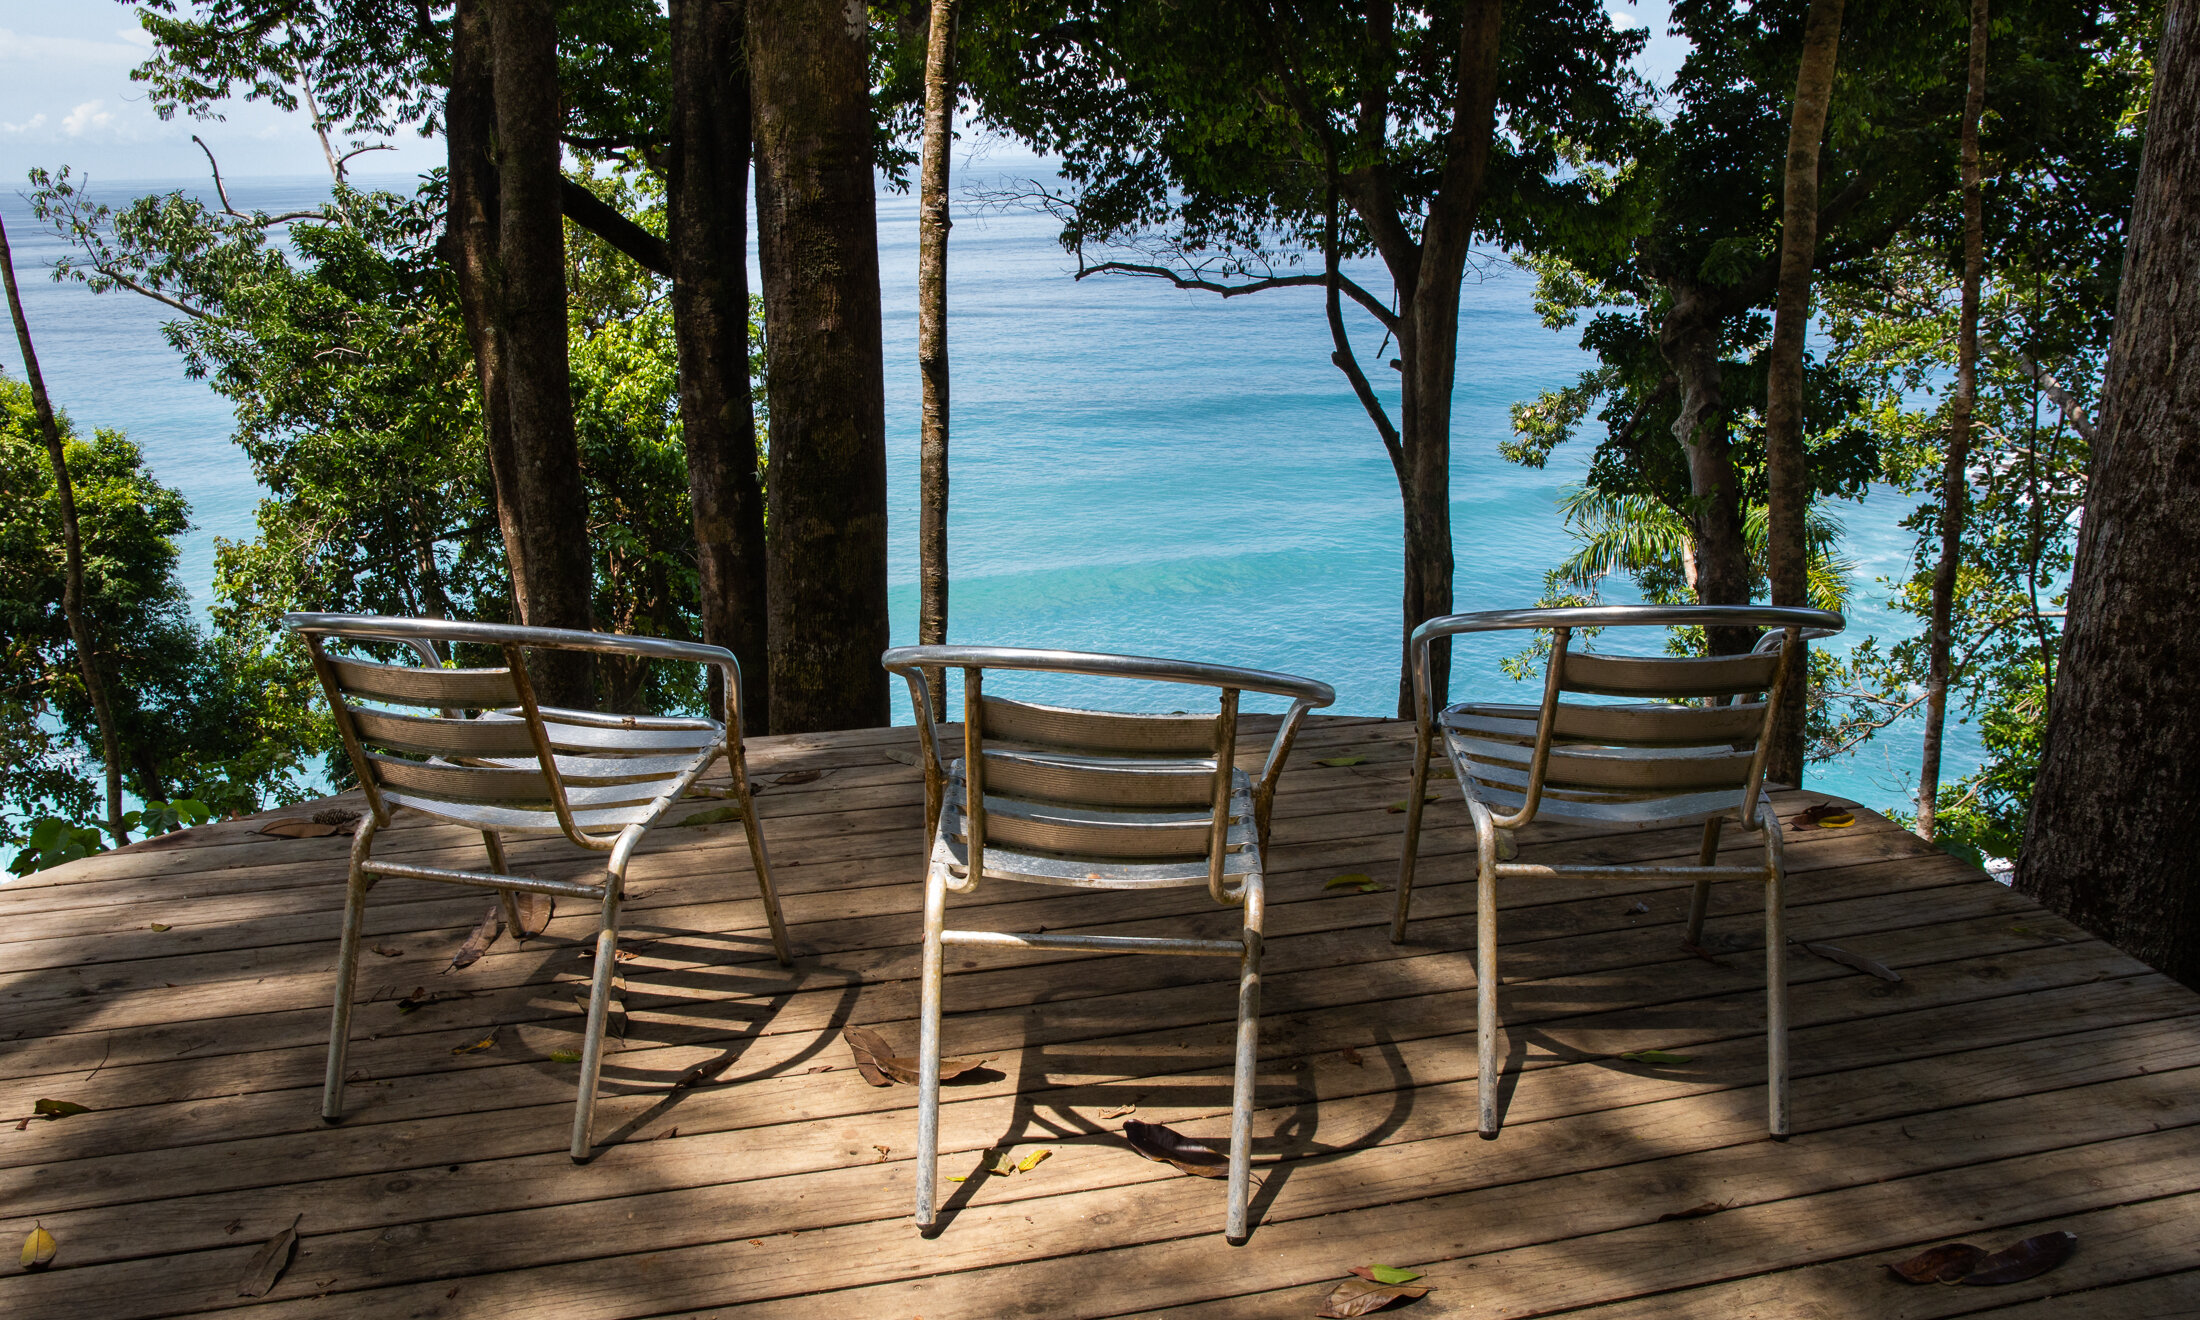
More compelling than camera time was deck time, which consisted of sitting outside of my little, cliff-top cabin listening to the Pacific Ocean crashing below and the sounds of the surrounding rainforest. The deck provided a front row seat to toucans, scarlet macaws, monkeys and all sorts of other animals and birds going about their lives in the nearby trees.

A pair of scarlet macaws having a feisty interaction in Costa Rica. © 2019 Elizabeth Acevedo

A pair of scarlet macaws having a feisty interaction in Costa Rica. © 2019 Elizabeth Acevedo

A view of the Pacific Ocean from the deck of my Osa Peninsula cabin.  © 2019 Elizabeth Acevedo

A view of the Pacific Ocean from the deck of my Osa Peninsula cabin. © 2019 Elizabeth Acevedo

I felt conflicted though, like I should be pushing through and taking full advantage of the time alone to work on my creative goals. The fatigue of body and spirit that I brought with me was real though. So whatever my intentions had been, sinking into the stillness and beauty of the Osa was the better way to spend the time.   

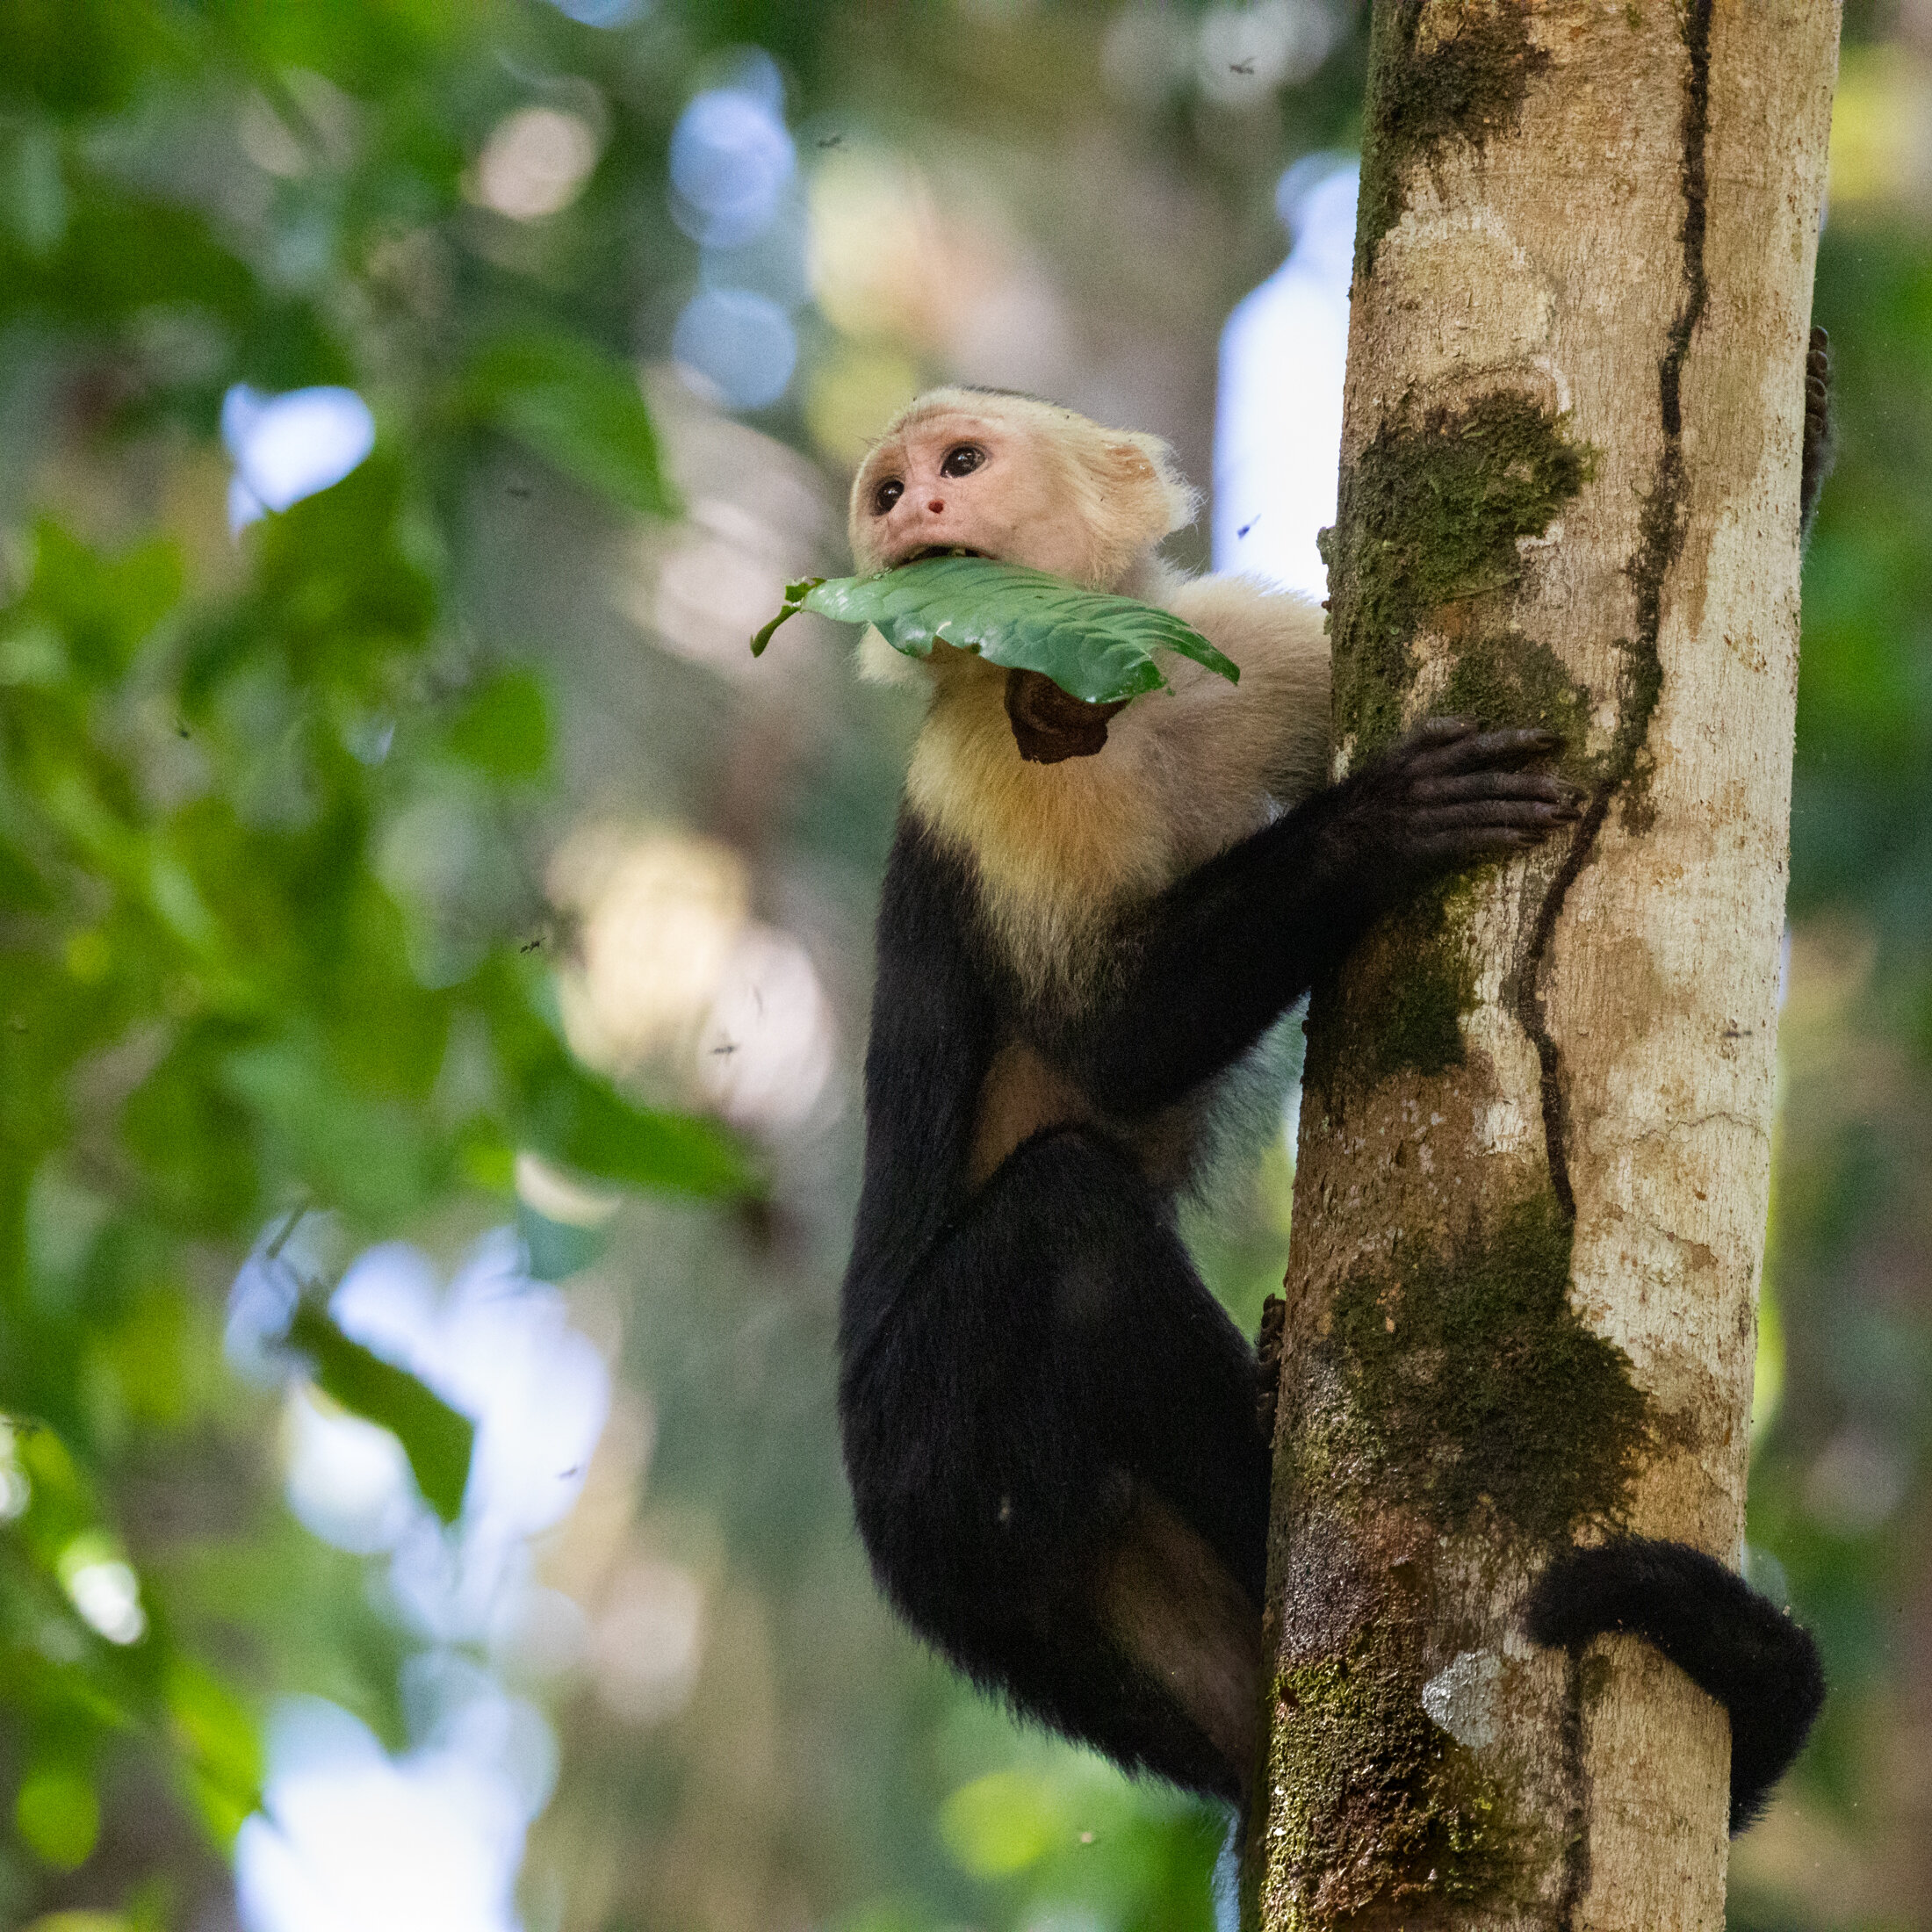
A capuchin monkey carries a leaf with a bees’ nest attached. © 2019 Elizabeth Acevedo

A capuchin monkey carries a leaf with a bees’ nest attached. © 2019 Elizabeth Acevedo

The lodge provided a great setting to do as little or as much as I wanted. With just a small number of cabins spread around the property, it felt quiet and private. There were easy walks or more challenging hikes on the property’s trails where I saw more much more wildlife than people. I also found my way to the lodge’s two pools for swims and fresh fruit smoothies from the bar, perfect remedies for the mid-day heat. More than anything else though, there were endless opportunities to watch wildlife and birds in their natural environment as most of the property is undeveloped. That, to me, is the most rejuvenating, joyful way to spend time, camera in hand or not. 

Despite my slow pace and tempered ambitions, I still explored some trails and made some photos, and am glad that I did.   Picture below is the lovely viewpoint that is about two-thirds of the way down the steep Pacific Trail that leads down to a beach, which is accessible only at low tide.

A deck with an ocean view offers a much-needed rest stop down the short but steep Pacific trail at Bosque del Cabo, Costa Rica.  © 2019 Elizabeth Acevedo

A deck with an ocean view offers a much-needed rest stop down the short but steep Pacific trail at Bosque del Cabo, Costa Rica. © 2019 Elizabeth Acevedo

Ultimately, this visit to Costa Rica reminded me that sometimes that list of things that we think we have to do or see while traveling has to give way to restoration.  

And in an even broader sense, the time in the Osa affirmed what I had already suspected:  traveling to be in nature always brings us what we need.  Our only job is to relax and follow the magic.

An iridescent blue morpho butterfly opens its wings on the trail for a quick moment before flying off, Osa Peninsula, Costa Rica.  © 2019 Elizabeth Acevedo

An iridescent blue morpho butterfly opens its wings on the trail for a quick moment before flying off, Osa Peninsula, Costa Rica. © 2019 Elizabeth Acevedo

Female photographer walks on mountain trail wearing F-Stop Kashmir backpack.  Photo credit: © 2018 Michael D. Brown

The F-Stop Kashmir UL - my favorite photo backpack

September 22, 2018

Photo credit: © 2018 Michael D. Brown

Update - August 2020: I have had plenty of opportunities to travel with the Kashmir UL now, and I still love it. Like any camera bag, it isn’t perfect but is the best fit that I have found so far for my frame and lets me carry a lot of heavy gear with relative ease. Read on for more details and the other packs I tried …

I admit that I am a little bit obsessed with finding the perfect camera backpack. Even though I know it does not exist, the search is SO fun! 

For years, I used an older model Lowepro side-entry backpack that was great for short photography outings but lacked the capacity needed for longer photo trips. What I really liked about that pack though was how well it fit my back. Later, I added the F-Stop Ajna 40 liter backpack, which I like a lot and easily holds what I need.  But the Ajna is not my go-to bag because, although it is pretty comfortable when carrying a lot of weight, I find it to be a little too tall for my frame (I’m just shy of 5’4”).

Female photographer wearing Ajna camera backpack by F-Stop. © Elizabeth Acevedo

In this picture, the Ajna’s top compartment is empty but you can see the height of the backpack frame reaches well above my neck. The frame is great when just carrying the bag, but it can get in the way if I try to take photos with the pack on and I want to have the option to do that, especially when traveling.

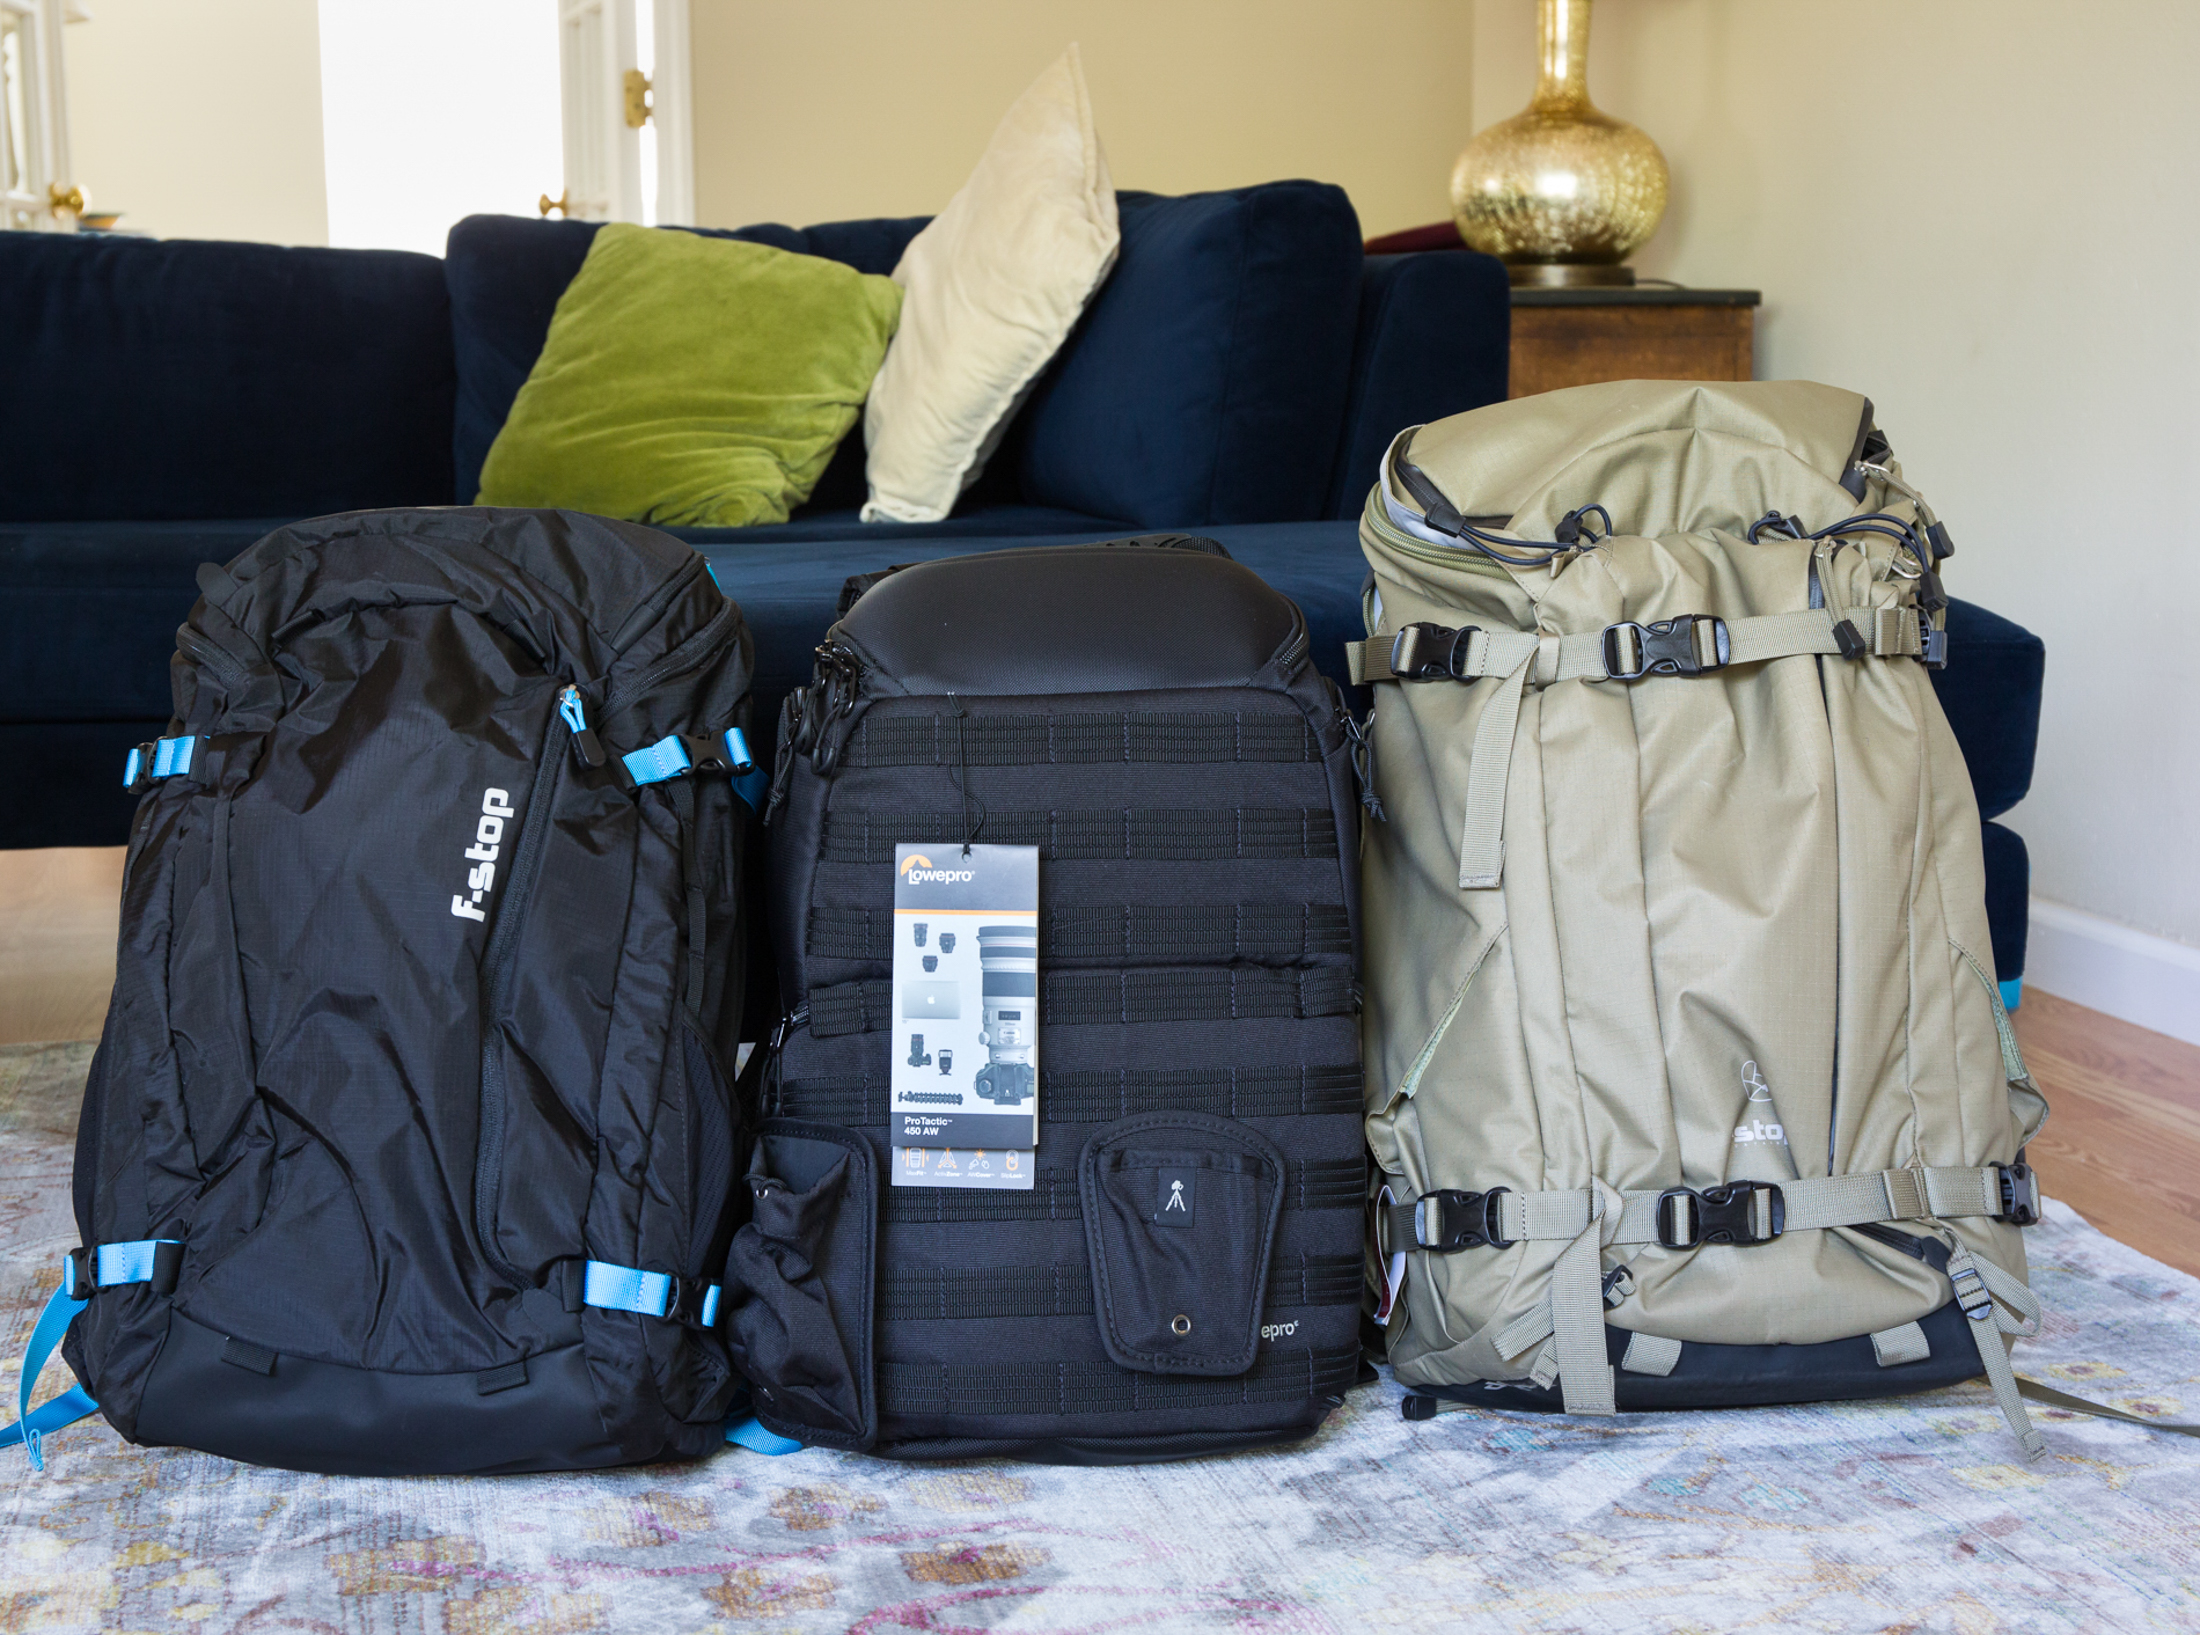
A recent solo trip to Iceland gave me a reason to try to find the medium-sized backpack missing from my stash.  I tried out the F-Stop Kashmir UL (ultra-light), which is designed for female photographers but holds only 30 liters, the Lowepro Protactic 450 AW, a medium pack with a completely different design, and kept the Ajna (40 liter capacity) in the running.

These were the contenders …

The F-Stop Kashmir UL (ultra-light, 30L), the Lowepro Protactic 450 AW, and the F-Stop Ajna (40L capacity) in side-by-side view.

The F-Stop Kashmir UL (ultra-light, 30L), the Lowepro Protactic 450 AW, and the F-Stop Ajna (40L capacity) in side-by-side view.

And I did a little test packing …

Kashmir, Protactic 450AW, Ajna camera bags and most of the gear I intended to bring. I also added two external hard drives and a laptop.

Kashmir, Protactic 450AW, Ajna camera bags and most of the gear I intended to bring. I also added two external hard drives and a laptop.

Gear packed into the Ajna with the removable large slope ICU (internal camera unit).

Gear packed into the Ajna with the removable large slope ICU (internal camera unit).

After testing the bags locally, the Lowepro was out of the running.  It is a really nice camera bag but, for me, the straps were not as comfortable as the other two bags, especially when it was packed full.  Also, I often have my camera set up with a Canon 100-400ii with a tripod collar and sometimes a L-bracket.  It was a bit of a struggle taking that configuration in and out of the bag from the top or side access points. 

Between the two F-Stop bags, for Iceland, I opted to try the Kashmir with the removable large slope ICU, which is inside the Ajna bag in the photos above. The Kashmir’s minimal weight and better fit won me over.  I did worry that its smaller capacity would be a problem.  In test packing, jamming the big ICU into it left only a little room for other travel or field items, like a rain jacket, gloves, snacks, etc.  Also, the Kashmir has surprisingly few zipped pockets, which is a drawback.   

But I was worrying for nothing because the Kashmir worked really well on my trip. 

Female photographer wearing the F-Stop Kashmir backpack in side view.

Although its shoulder straps were slightly less hearty as those on the Ajna, I found the Kashmir to be incredibly comfortable when packed to the brim with heavy gear.  I likely overloaded the pack using the full, large slope ICU, shoving all the little extra items in the top and outside pockets, and occasionally attaching a tripod to the outside straps, but it held up just fine.  

And I was so glad not to have one more ounce with me than I did.  I was traveling alone and wanted to manage my bags without too much struggle.  [That goal decidedly was NOT accomplished … oh, there were luggage struggles but not because of the Kashmir.]  Plus, because of its size, I didn’t feel as conspicuous walking through the airport or other public places as I did when I traveled with the Ajna in the past.  Although the Ajna probably fits a taller person perfectly, it looks a little bit like I might teeter over when its on my back filled with gear. I worried that look might make an airline employee question its weight and carry-on compatibility, especially when traveling on smaller planes. 

It is always hard to know whether a bag will work for your body and camera gear before you have it in hand.  But if you are smaller framed person – male or female, and are considering the Kashmir, I would give it a try.

ps - I purchased each of these bags myself and just wanted to share with you what I learned from trying them out.

In Photography, Travel, Camera Gear Tags photography, backpack, camera, travel, Kashmir, Ajna, Lowepro, Protactic, F-Stop, female, photographer, gear, bag, camera bag, woman, camera backpack for women, photo bag for women, women hiking camera backpack, hiking camera bag, womens photo backpack review, female photographer backpack, travel photography gear, nature photography gear, female nature photographer, outdoor camera gear, gear review, backpack review, camera bag review, Kashmir review
A photographer capturing the waterfalls at Kirkjufellsfoss on the Snaefellsnes Peninsula. © 2018 Elizabeth Acevedo 

A photographer capturing the waterfalls at Kirkjufellsfoss on the Snaefellsnes Peninsula. © 2018 Elizabeth Acevedo

ICELAND PACKING TIPS FOR EARLY SUMMER - I NEEDED EVERY LAYER

August 25, 2018

As much as I love to travel with good company, I really enjoy the freedom of venturing off on my own.  Even so, before a solo trip to a new destination, I always experience a little anxiety - the good kind of butterflies that come with doing something amazing but out of my comfort zone.  I tend to cope with that with excessive pre-trip planning, which also extends the fun of travel beyond the actual trip itself. 

So before heading to Iceland for the first time earlier this summer, I researched like crazy about what clothes to bring, what photography gear I might want with me, how to get good wifi connections and everything else that came to mind.  There are great blog posts and articles out there that provide excellent, more thorough tips than mine here.  But just in case it helps you prepare for a first trip to Iceland, I thought I would offer my main takeaways. 

*One caveat: I am a total baby when it comes to cold weather, even though I actually prefer it to sweltering hot temperatures, like what we have here in the Southeast U.S.  If you wear flip-flops and shorts in Seattle in December, you probably will pack pretty differently than I did.

The "bring layers and more layers" tip that I read everywhere was good advice.   

I visited Iceland in late May/early June and experienced a wide array of weather each day.  The actual temperatures were pretty mild while I was there, ranging from mid-30s to upper 70s, but the wind was biting a lot of the time. 

Merino wool or capilene base layers were my best friends.  I wore them almost everyday.  A wind- and water-proof jacket was another essential that I used everyday over a lightweight insulated jacket, along with a fleece-llned hat and gloves. 

There were windows of warm sunshine when all of the outer layers came off.  But the clouds or wind always returned and then everything went back on.  That was especially (and I guess obviously) true near the glaciers, which are beautiful sights scattered along the southern coast. 

Sunset breaks through clouds at Jokulsarlon glacier lagoon in Iceland. © 2018 Elizabeth Acevedo 

Sunset breaks through clouds at Jokulsarlon glacier lagoon in Iceland. © 2018 Elizabeth Acevedo

A family hiking to the edge of Skaftafellsjokull glacier in southern Iceland’s Skaftafell National Park. © 2018 Elizabeth Acevedo

A family hiking to the edge of Skaftafellsjokull glacier in southern Iceland’s Skaftafell National Park. © 2018 Elizabeth Acevedo

During the short trail walk to the glacier's edge in Skaftafell National Park, for example, the weather started off warm with blazing sun beating down and only the lightest layer was needed.  Once approaching the glacier though, the temperature changed to a serious wintery chill,  which meant the jackets, hat and gloves went on again. 

Even traveling in summer, seriously consider bringing a winter-weight coat. 

Okay, this is another layer point but is worth mentioning on its own.  I read articles suggesting that, by late May or early June, it might be possible to have only a light, insulated jacket (like The North Face thermoball I wore) and a water/wind proof jacket.  I definitely needed more.  I toiled over bringing a heavy coat as I really wanted to avoid the extra weight and hassle of more stuff.  But I decided to be realistic about my low tolerance for cold.  I ended up bringing and wearing a parka by The North Face -- water- and wind-proof, down and with a hood that I could (and did) pull over my hat -- more often than I expected.  I honestly would have been miserable at some places without it and it was easy enough just to leave it in the car when it was too much. 

Also, as a photographer, I tend to stand outside for long periods.  Even for non-photographers, the whole point of visiting Iceland is to experience the gorgeous landscape so it would be sad to rush through a location because you are too cold.   

Hiking shoes/boots – bring an extra pair. 

Along with a pair of hiking boots, I brought along a pair of Teva hiking shoes -- grippy sole and waterproof sneakers – that saved me when, about midway through my trip, the boots started giving me trouble.  I wasn't doing any serious hiking so it was surprising.  Maybe carrying the weight of the full camera pack made a difference, I don’t know.  Anyway, having the extra pair did the trick for my light, short hikes and was a trip saver. 

One last idea … 

 If you have a rental car and stay at a different inns every night, like I did, consider leaving the big suitcase in the trunk of the car.  Instead of dragging it in and out of the car every day, I left it in the trunk most nights and just grabbed my toiletries and a small packing cube with the clothes I’d need to sleep in and to wear the next day, plus my photo gear.  I reorganized the big suitcase every once in awhile and it worked out pretty well.

Having two pairs of hiking shoes, Vasque and Teva, saved me on my Iceland trip.  © 2018 Elizabeth Acevedo

Images and content above are © Elizabeth Acevedo. All rights reserved.

In Travel, Photography Tags Iceland, packing, summer, travel, tips, advice, jacket, weather, solo traveling, outdoor, adventure, Jokulsarlon, Skaftafell, Kirkjufell, waterfall, sunset, gear, exploring, wanderlust, travel tips, Iceland packing tips, Iceland summer packing tips, hiking shoes, Teva womens hiking shoes, Iceland clothing advice, Packing for Iceland, The North Face arctic parka, Arrowood hiking shoes, May in Iceland

ARCHIVES

Iceland-Jokulsarlon-sunset.jpg
Eyes Lead the Way

A blog dedicated to the pursuit of light, adventure, and joy!


All images are copyrighted © 2010-2025 Elizabeth Acevedo. All rights reserved.


New to bird photography? Grab your free Quickstart camera settings Guide!

Sign up and download your free quickstart guide to camera settings for bird photography!

We respect your privacy.

After you’ve reviewed the guide, it’s time to go outside with the camera and find some beautiful birds!

All my best,

Elizabeth

Privacy Policy Disclaimer